How to use VEST: A free online tool for segmenting video clips
Photo by Vanilla Bear Films on Unsplash
This post was also published in Towards Data Science on Medium
Boost your ML research by using this video event segmentation tool for qualitatively coding your video clips
Analyzing video recordings of human and animal behaviors has been a powerful tool for researchers across disciplines.
In recent years, computer vision and machine learning advances have greatly facilitated automated video analyses (e.g. object detection, facial expressions, poses). However, human inputs are still required to identify and label new event categories, interactions, or phenomena to analyze and train new models.
As a social psychology researcher, I spent a lot of time analyzing video recordings of social interactions. However, I was never satisfied with the video tools available for labeling and segmenting events (e.g. ELAN). Many tools were proprietary, require complex installations, and difficult to use (list of tools).
After years of searching, I finally built my own Video Event Segmentation Tool (VEST) that is free, open-source, customizable, and easy to use. Here is a tutorial on how to use VEST for your own research.
How to use VEST
1. Find the tool
VEST is accessible online through your web browser (e.g. Chrome, Safari, Edge). All you have to do is navigate to https://jinhyuncheong.com/vest/vest.html and you instantly have the tool in your hand (screenshot below).
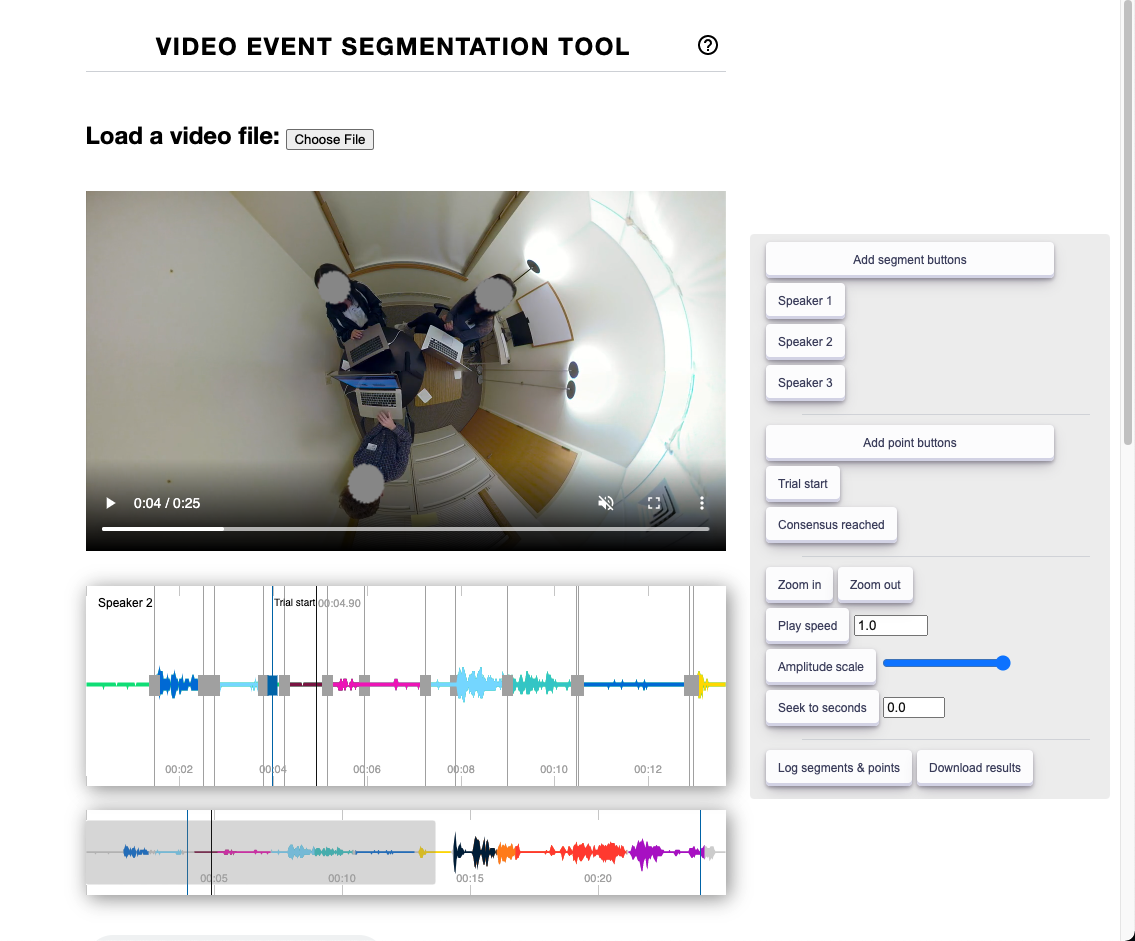
Video Event Segmentation Tool (VEST) in action. Tool consists a video player, audio waveform visualizer, and control panel to the right.
2. Load up your video
Once you have the website loaded, use the Choose file button to load your video. VEST uses Web Audio API and audio BBC’s peaks.js behind the scenes to visualize the audio waveforms from your video. This visualization helps you identify the start and stop of events with greater accuracy.
3. Set up your segment labels
Once your video is loaded, you can add the labels for your events of interest by using the Add segment buttons. This button will ask you to write out what the name of your event would be. For example, this could be Speaker 1 if you are simply segmenting when different speakers are talking (see bottom-left figure). Once you click submit, you’ll see that a button with your event label appear in the control panel on the right side of the screen (bottom-right figure). Now you can play the video and click the Speaker 1 button whenever you need to label that segment. You can finely adjust the start and stop times after adding the segment.
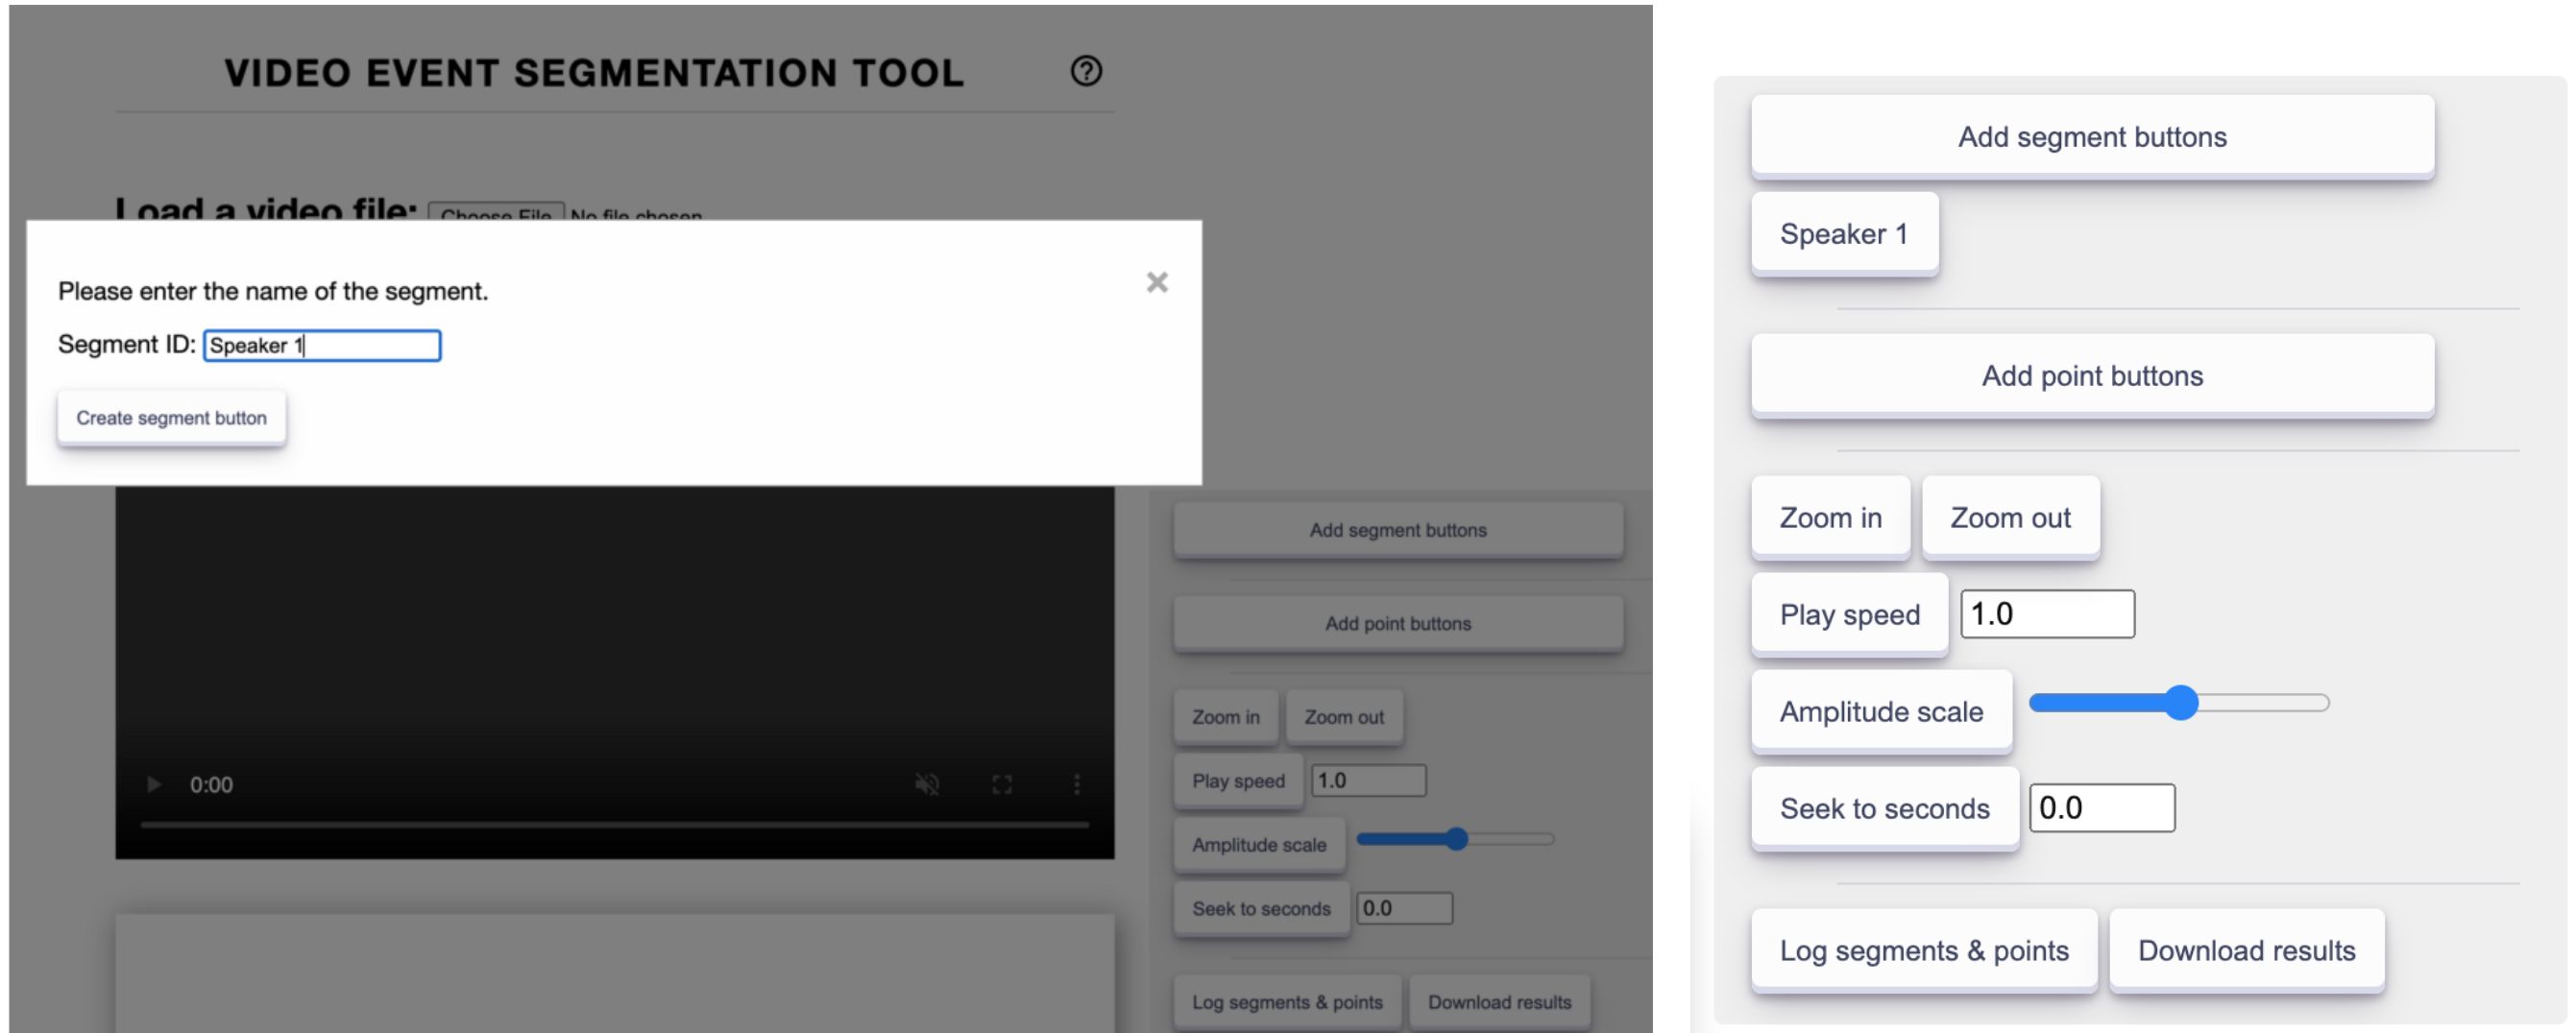
(left) Adding a event segmentation button. (right) Added button to the control panel. Images by author.
4. Save your annotations
Once you are done coding your video, you can download the results into a standard json file using the Download results button from the control panel. You can load the data file into any analysis language (e.g. R, Python). Here is a Python example which is also available as a Colab Notebook: https://gist.github.com/jcheong0428/785394bd3710e309790c1a99170d7da5:
import pandas as pd

def parse_vest_json(f):
  """Parse json output from VEST
  Args:
    f: path to VEST json output

  Returns:
    segmentations dataframe
    points dataframe
  """
  seg_df, pts_df = pd.DataFrame(), pd.DataFrame()

  df = pd.read_json(f, lines=True)
  seg_cols = [col for col in df.columns if 'segment' in col]
  _seg_df = df[seg_cols].dropna().T
  for rowix, row in _seg_df.iterrows():
      seg_df = pd.concat([seg_df, pd.DataFrame(row.values[0],index=[row.name])])

  pts_cols = [col for col in df.columns if 'point' in col]
  _pts_df = df[pts_cols].dropna().T
  for rowix, row in _pts_df.iterrows():
      pts_df = pd.concat([pts_df, pd.DataFrame(row.values[0], index=[row.name])])
  return seg_df, pts_df


path_to_file = "/content/segmentation_results.json"
seg_df, pts_df = parse_vest_json(f=path_to_file)
display(seg_df, pts_df)
FAQs
- Waveforms are too small. Use the Amplitude scale to increase the size of the waveform. You can also use the Zoom in or Zoom out button to adjust the temporal width of the waveform that is visualized.
- My audio isn’t loading. It might take a few seconds for your audio to be extracted from your video for it to be visualized. Naturally, longer videos take a longer time to extract the audio. If you still don’t see it, please open an issue.
- I have a long video, what should I do? VEST does not have a backend server. This means any progress will be lost if you close your browser. Therefore I highly recommend you save frequently when you are working on a long video.
- How do I customize the tool? VEST is open source so you can access the source code at https://github.com/jcheong0428/vest. You can clone the repository and run the webpage locally with any modifications you wish.
- I want to give feedback on the tool. I would LOVE to get your feedback on how the tool can be improved. Please note that the tool is meant to be quite basic so that it’s flexible and easy to use. Nonetheless, any suggestions or bug reports are welcome through the project repository or Twitter.
I hope you find VEST useful in your next video analysis project. Looking forward to all the cool new analyses and machine learning models that will be built in the future!
Just to recap, use the video event segmentation tool here: https://jinhyuncheong.com/vest/vest.html
And the repository here: https://github.com/jcheong0428/vest
machine-learning data-science javascript