Setting up LabJack to trigger BIOPAC with MATLAB or Psychopy
https://labjack.com/products/u3
Here is a tutorial on how to setup your LabJack to send triggers from MATLAB to BIOPAC. This is an extension to Luke’s labjack tutorial
At COSAN lab we use BIOPAC to record Skin Conductance and respiration for many of our experiments. I use MATLAB Psychtoolbox to design my stimulus presentation paradigm. Of utmost importance is to know when the stimulus occurred to match the physiological response with the appropriate condition.
You can purchase stimulus presentation softwares that already has integrations with BIOPAC such as E-Prime but if you want flexibility for your experiments, setting up your own recording system is pretty simple (and cheap!).
Materials needed
- LabJack DAQ: We use the LabJack U3-LV which costs $108
- an Ethernet cable
- wire stripper is handy but I used a long nose plier just fine
- BIOPAC UIM100C
HOW-TO (Hardware prep)
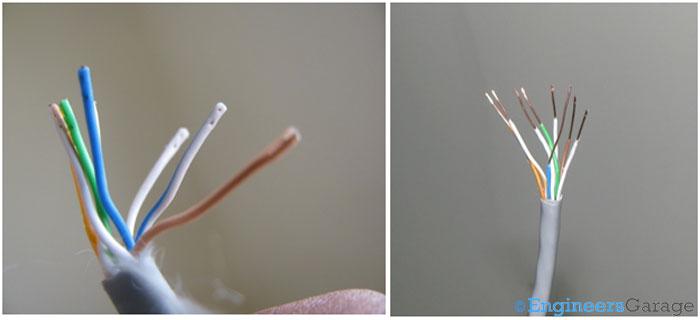
Step 1: Cut your cables
Cut your Ethernet cable and strip the wires with a wire stripper (or pliers or scissors) on both ends. Each Ethernet cable gives you 8 wires so you want two sets.
http://triangleframe.blogspot.com
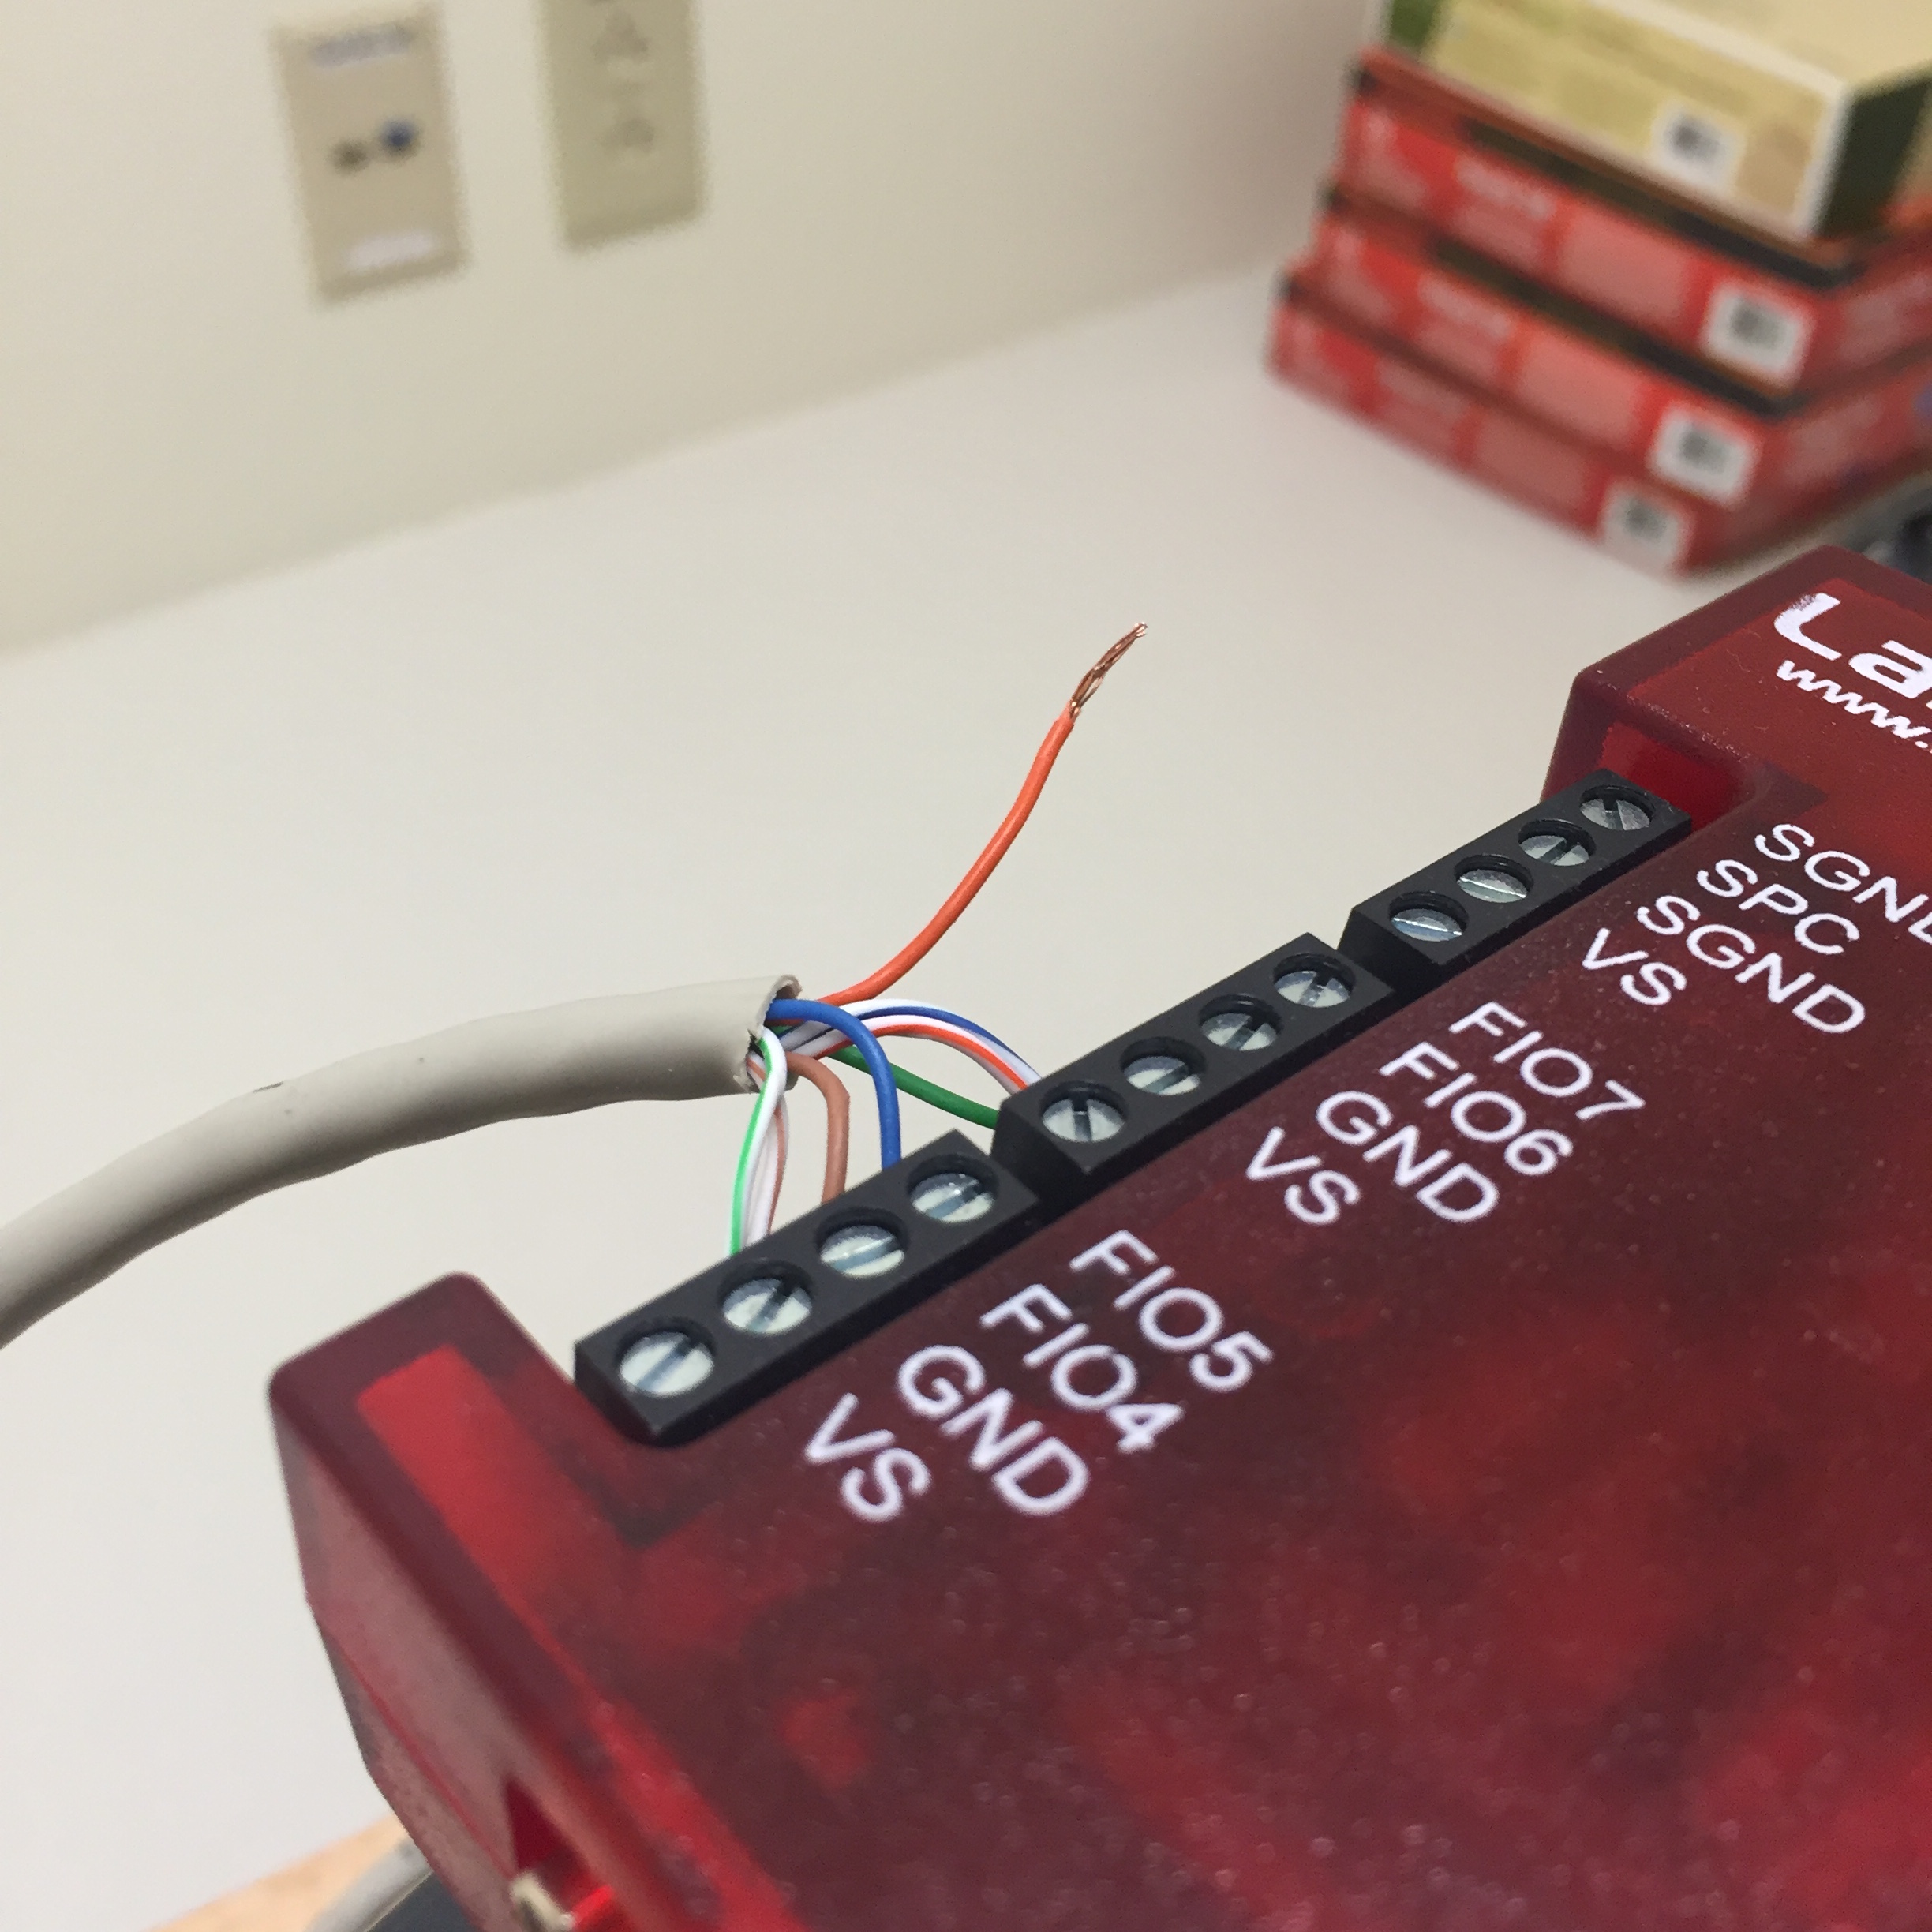
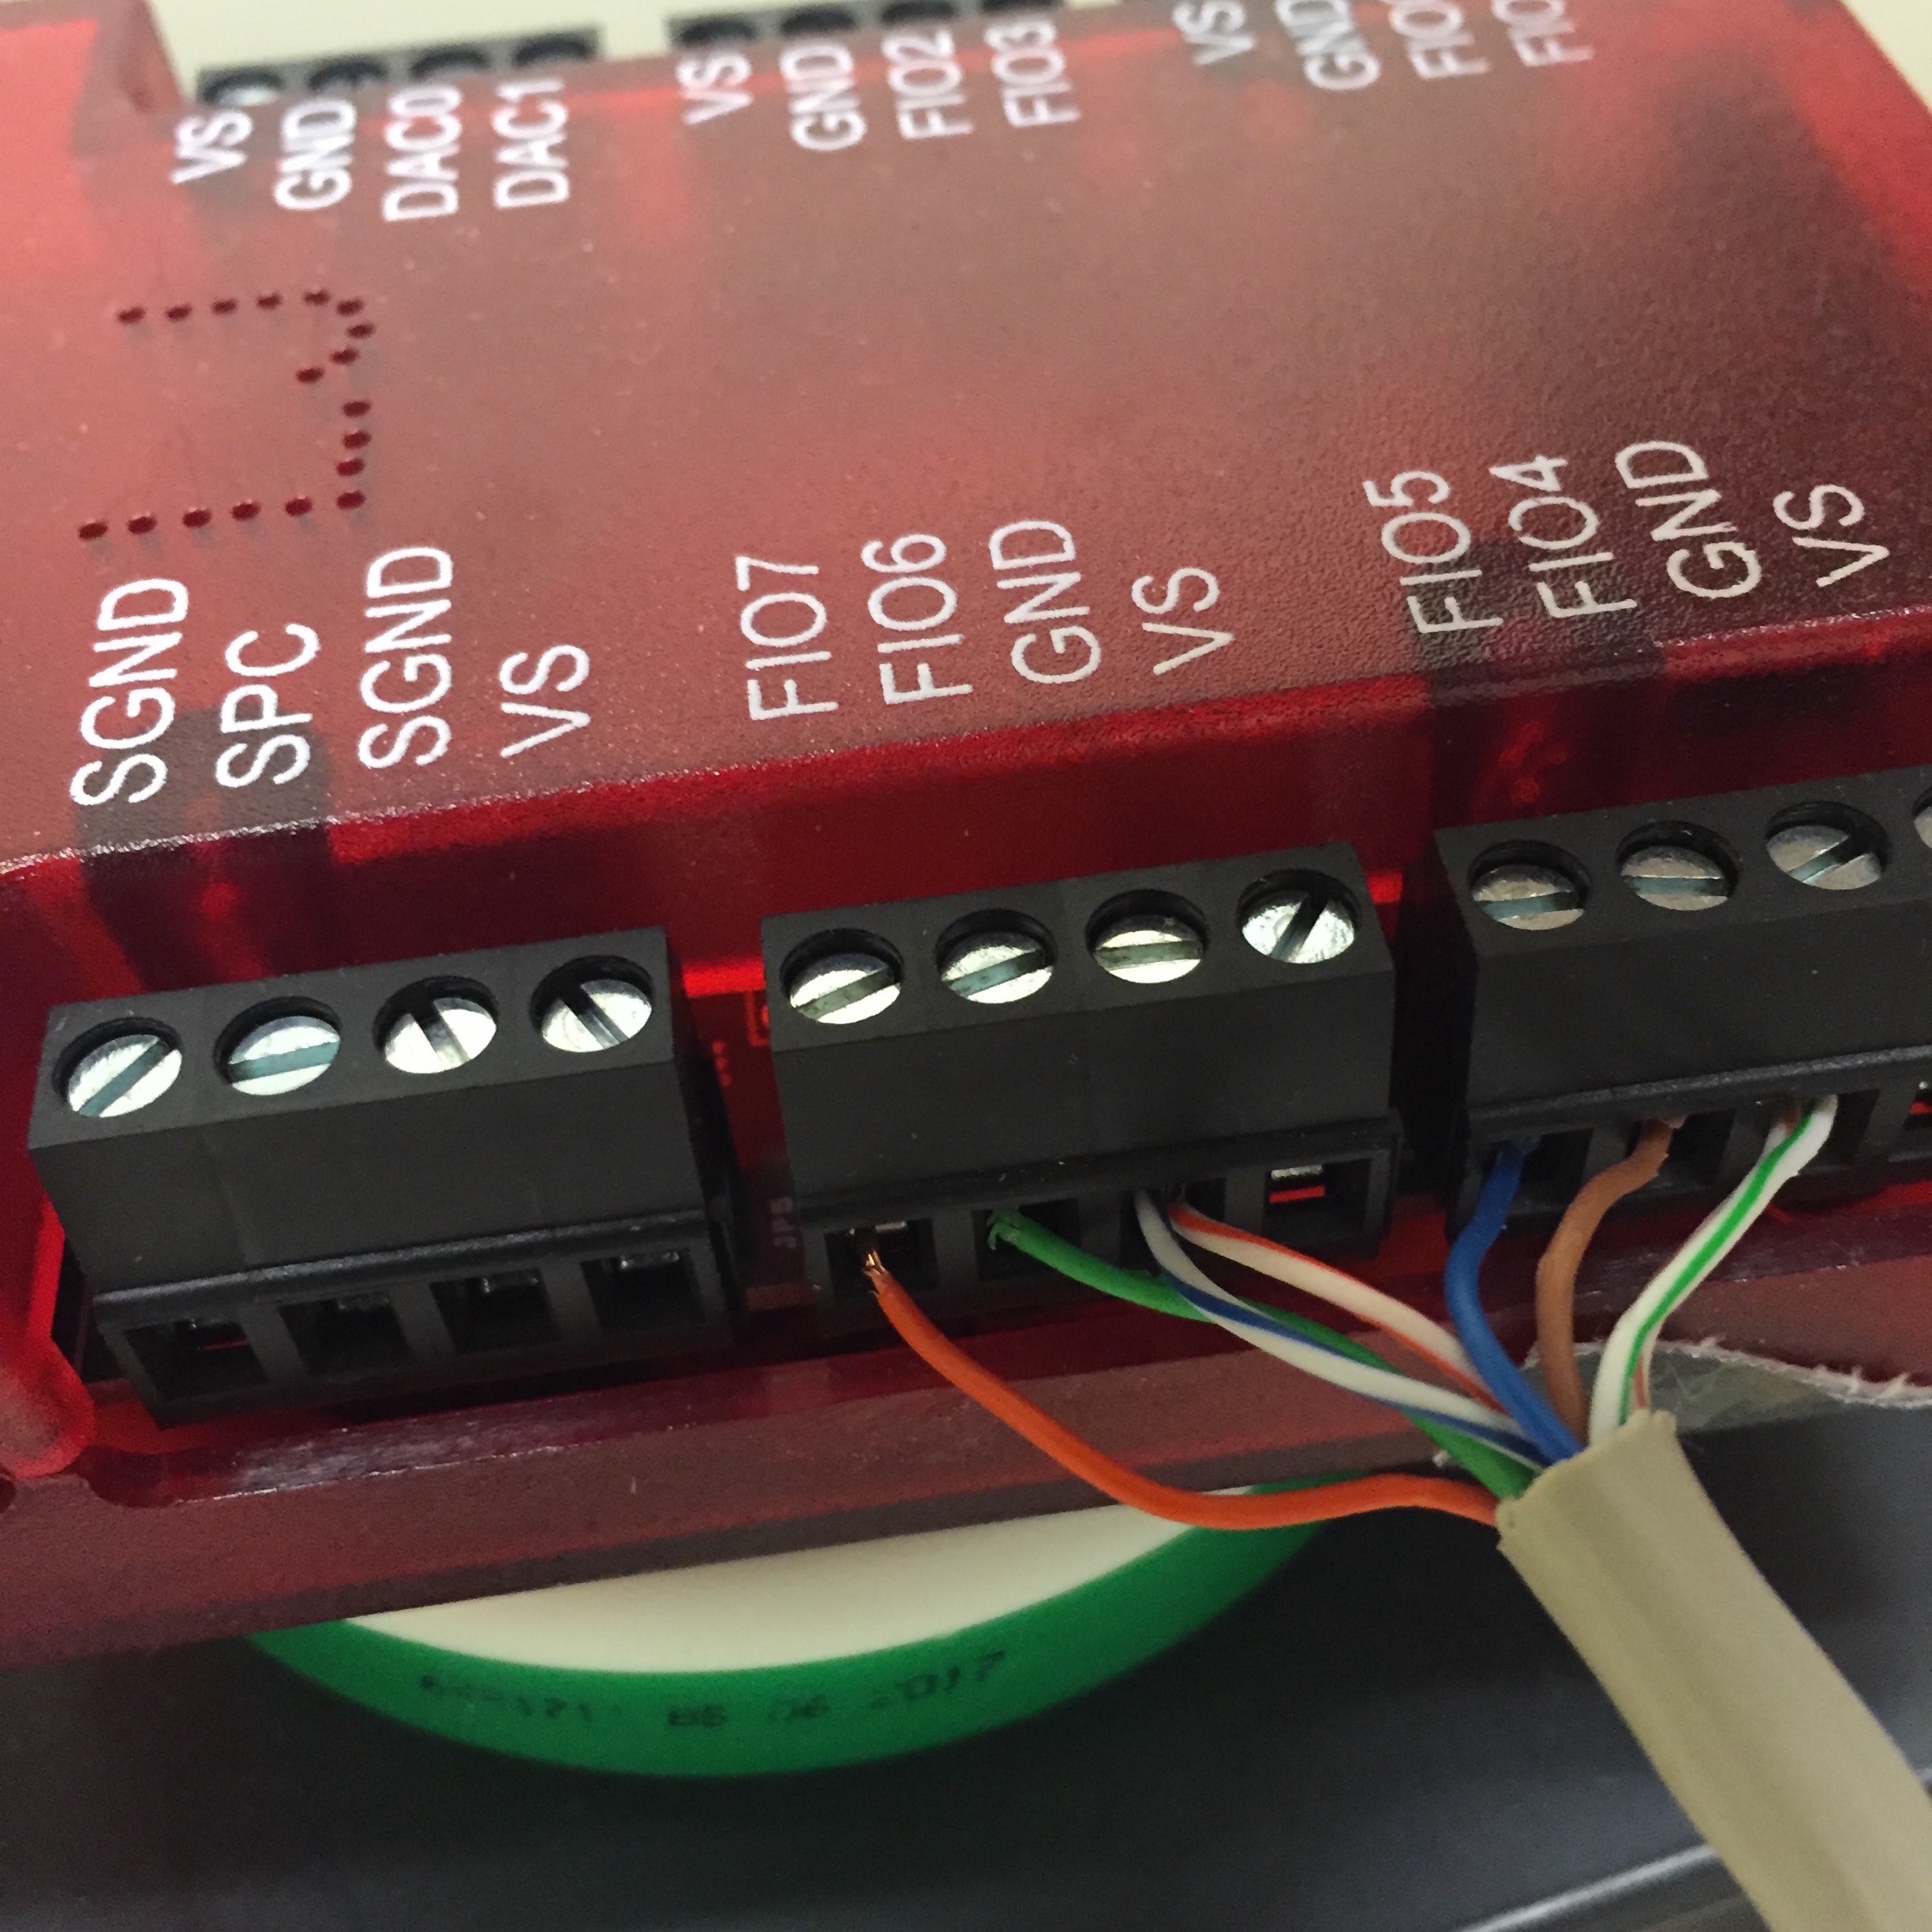
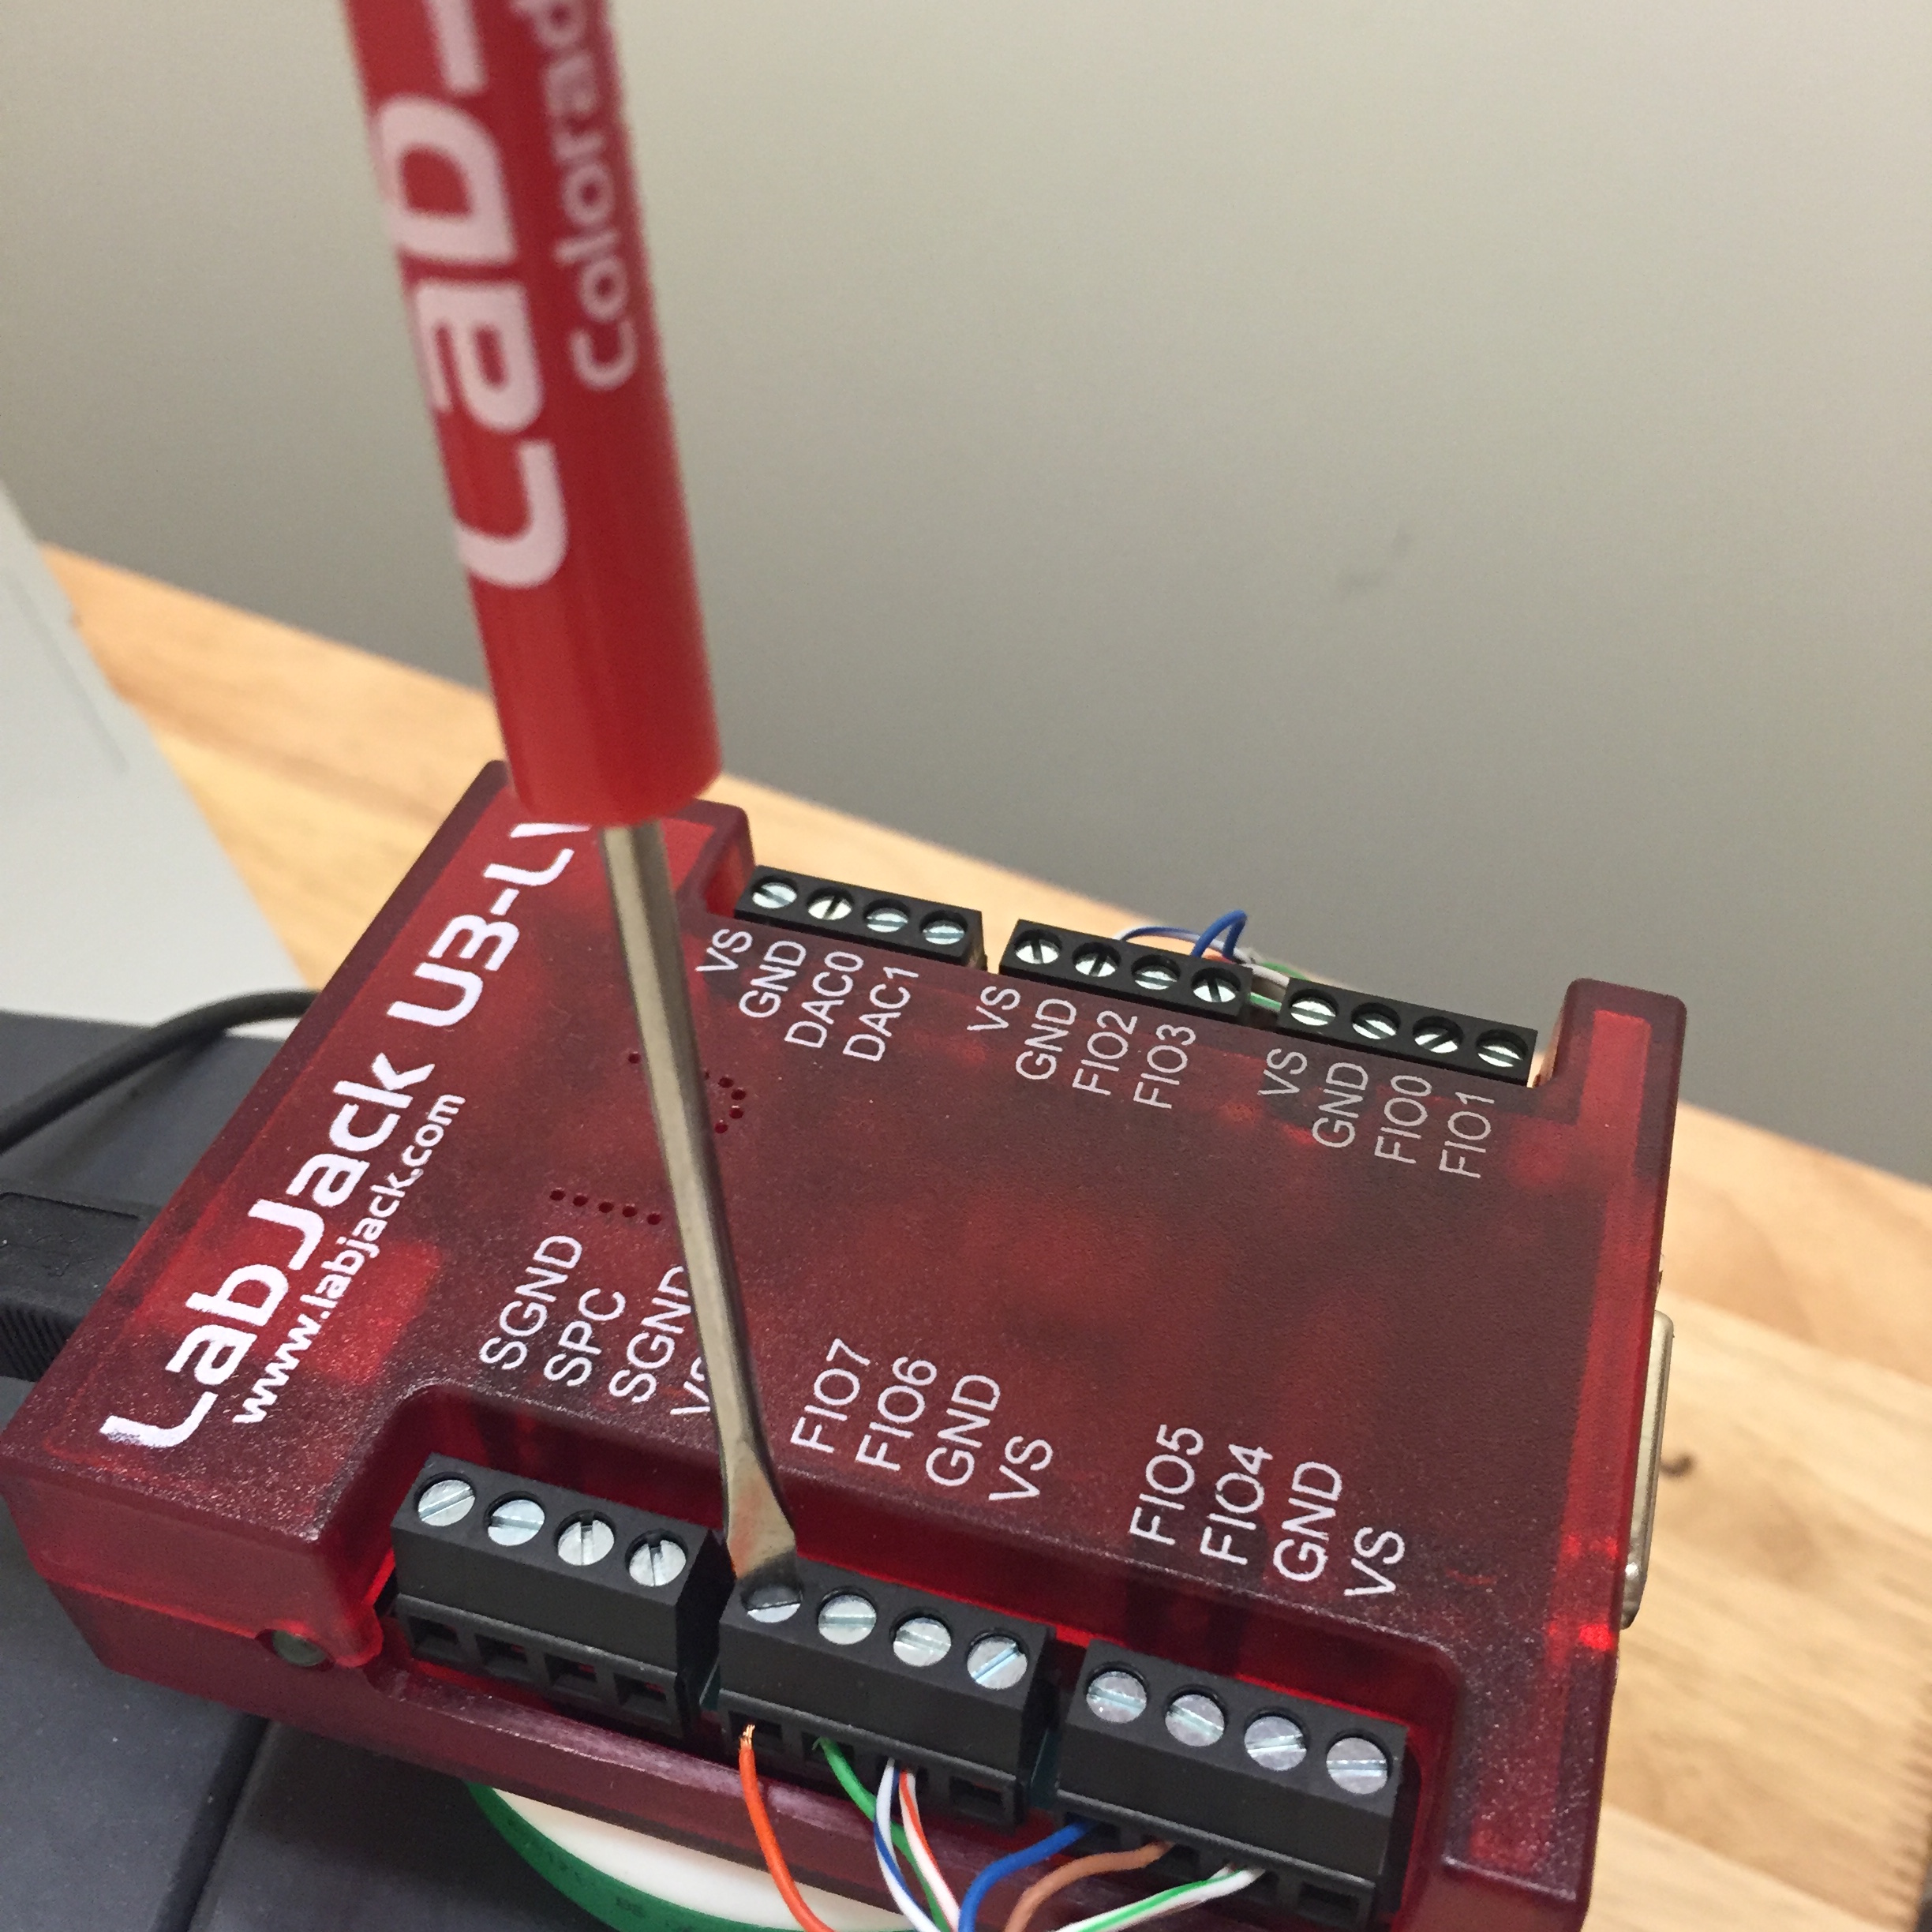
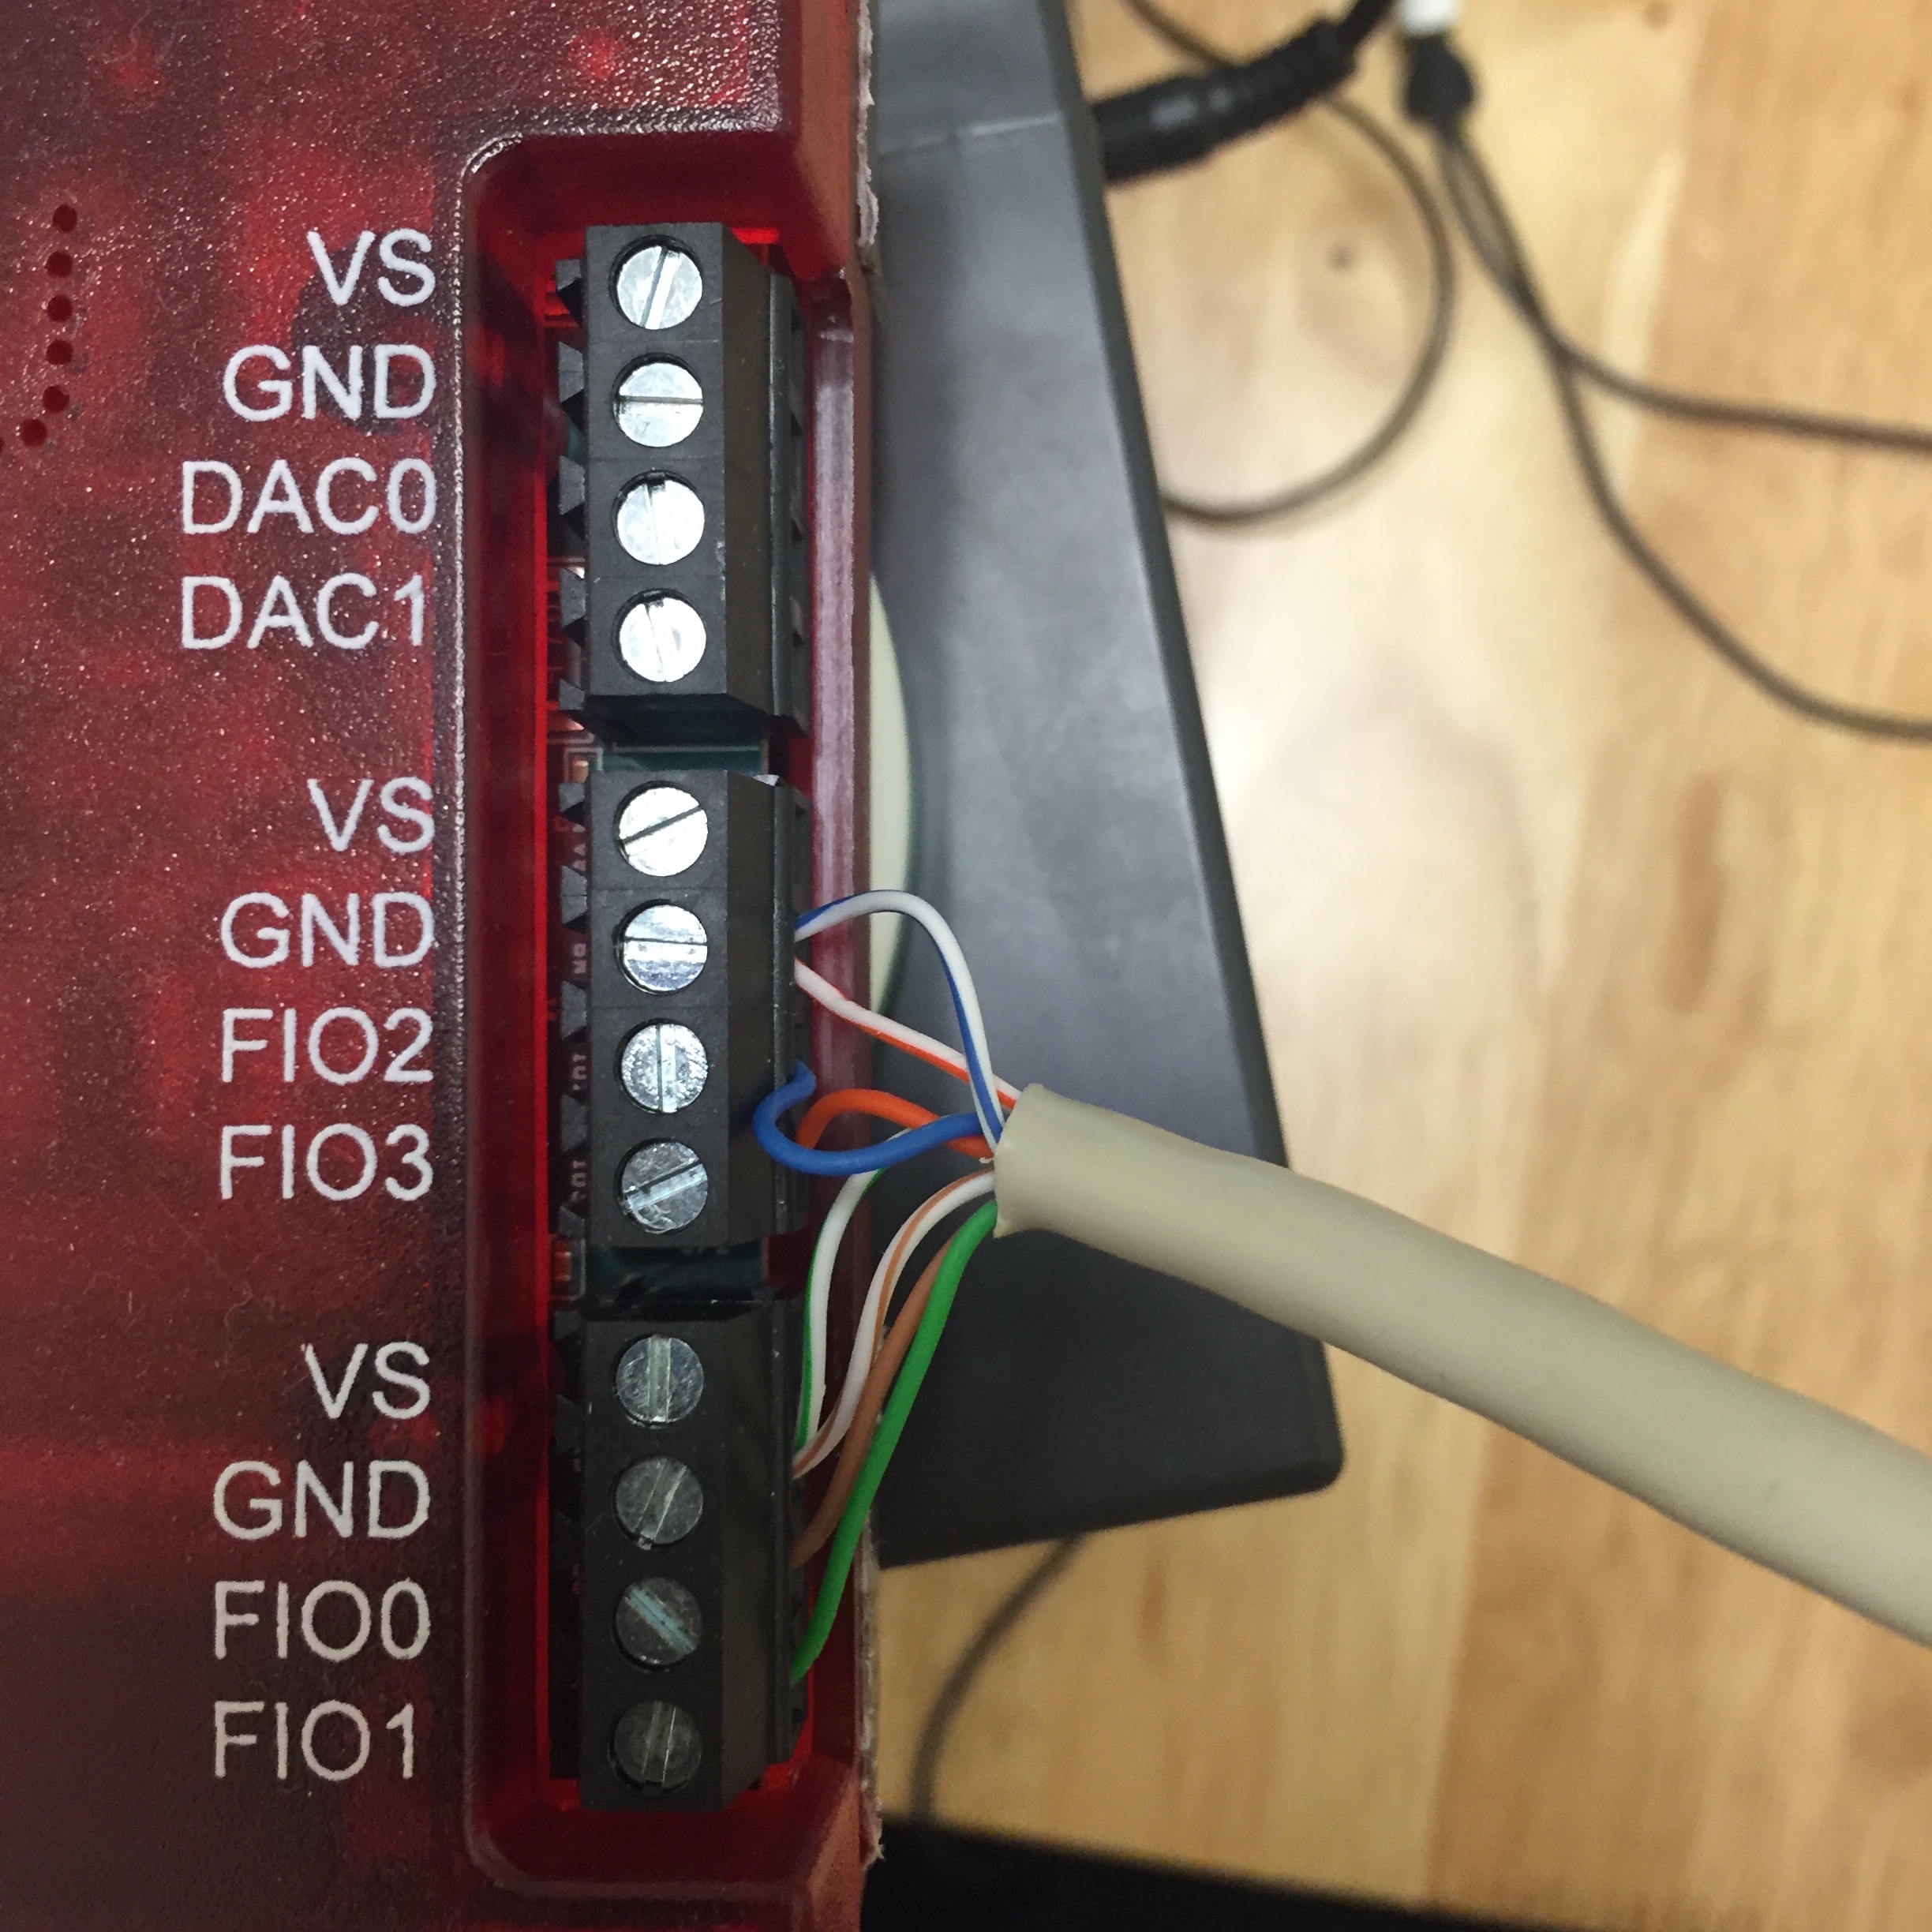
Step 2: Install wires to labjack 1
Take one cable and plug the wires into one side of your LabJack. Have 4 wires go each into FI04 ~ 07 and the other 4 into the Ground (GND). Tighten the screws to secure the wires in place.
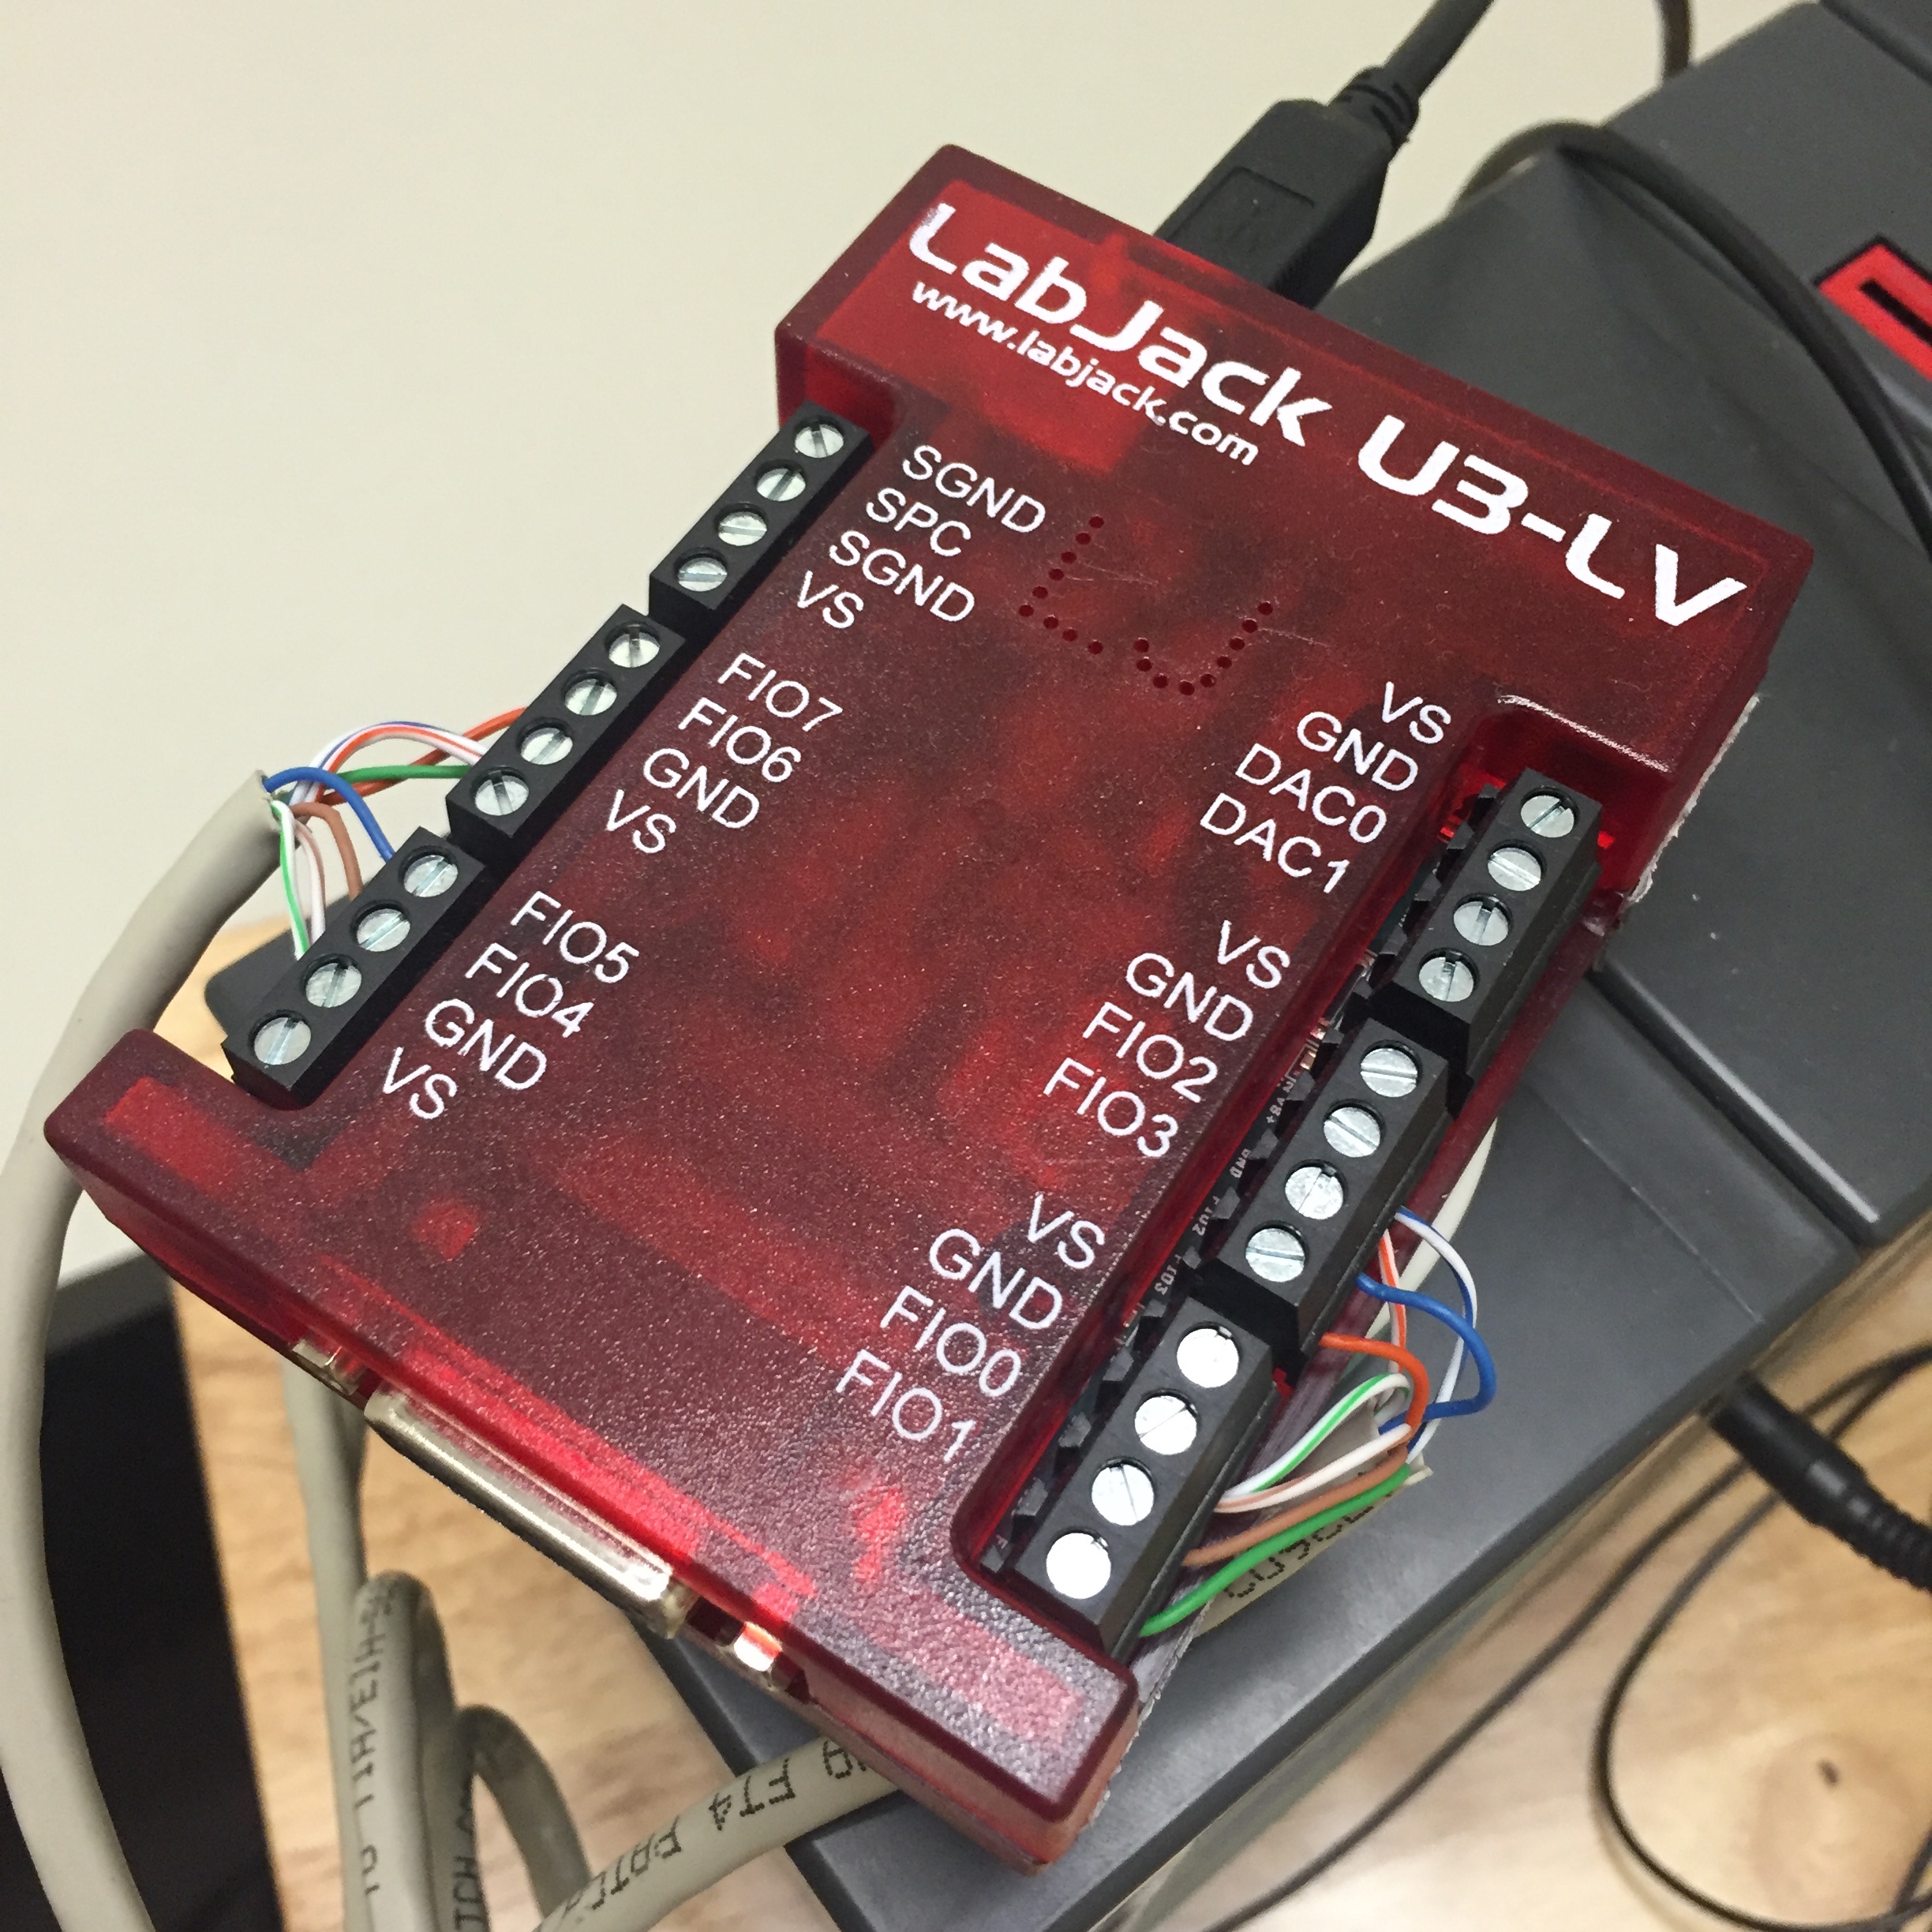
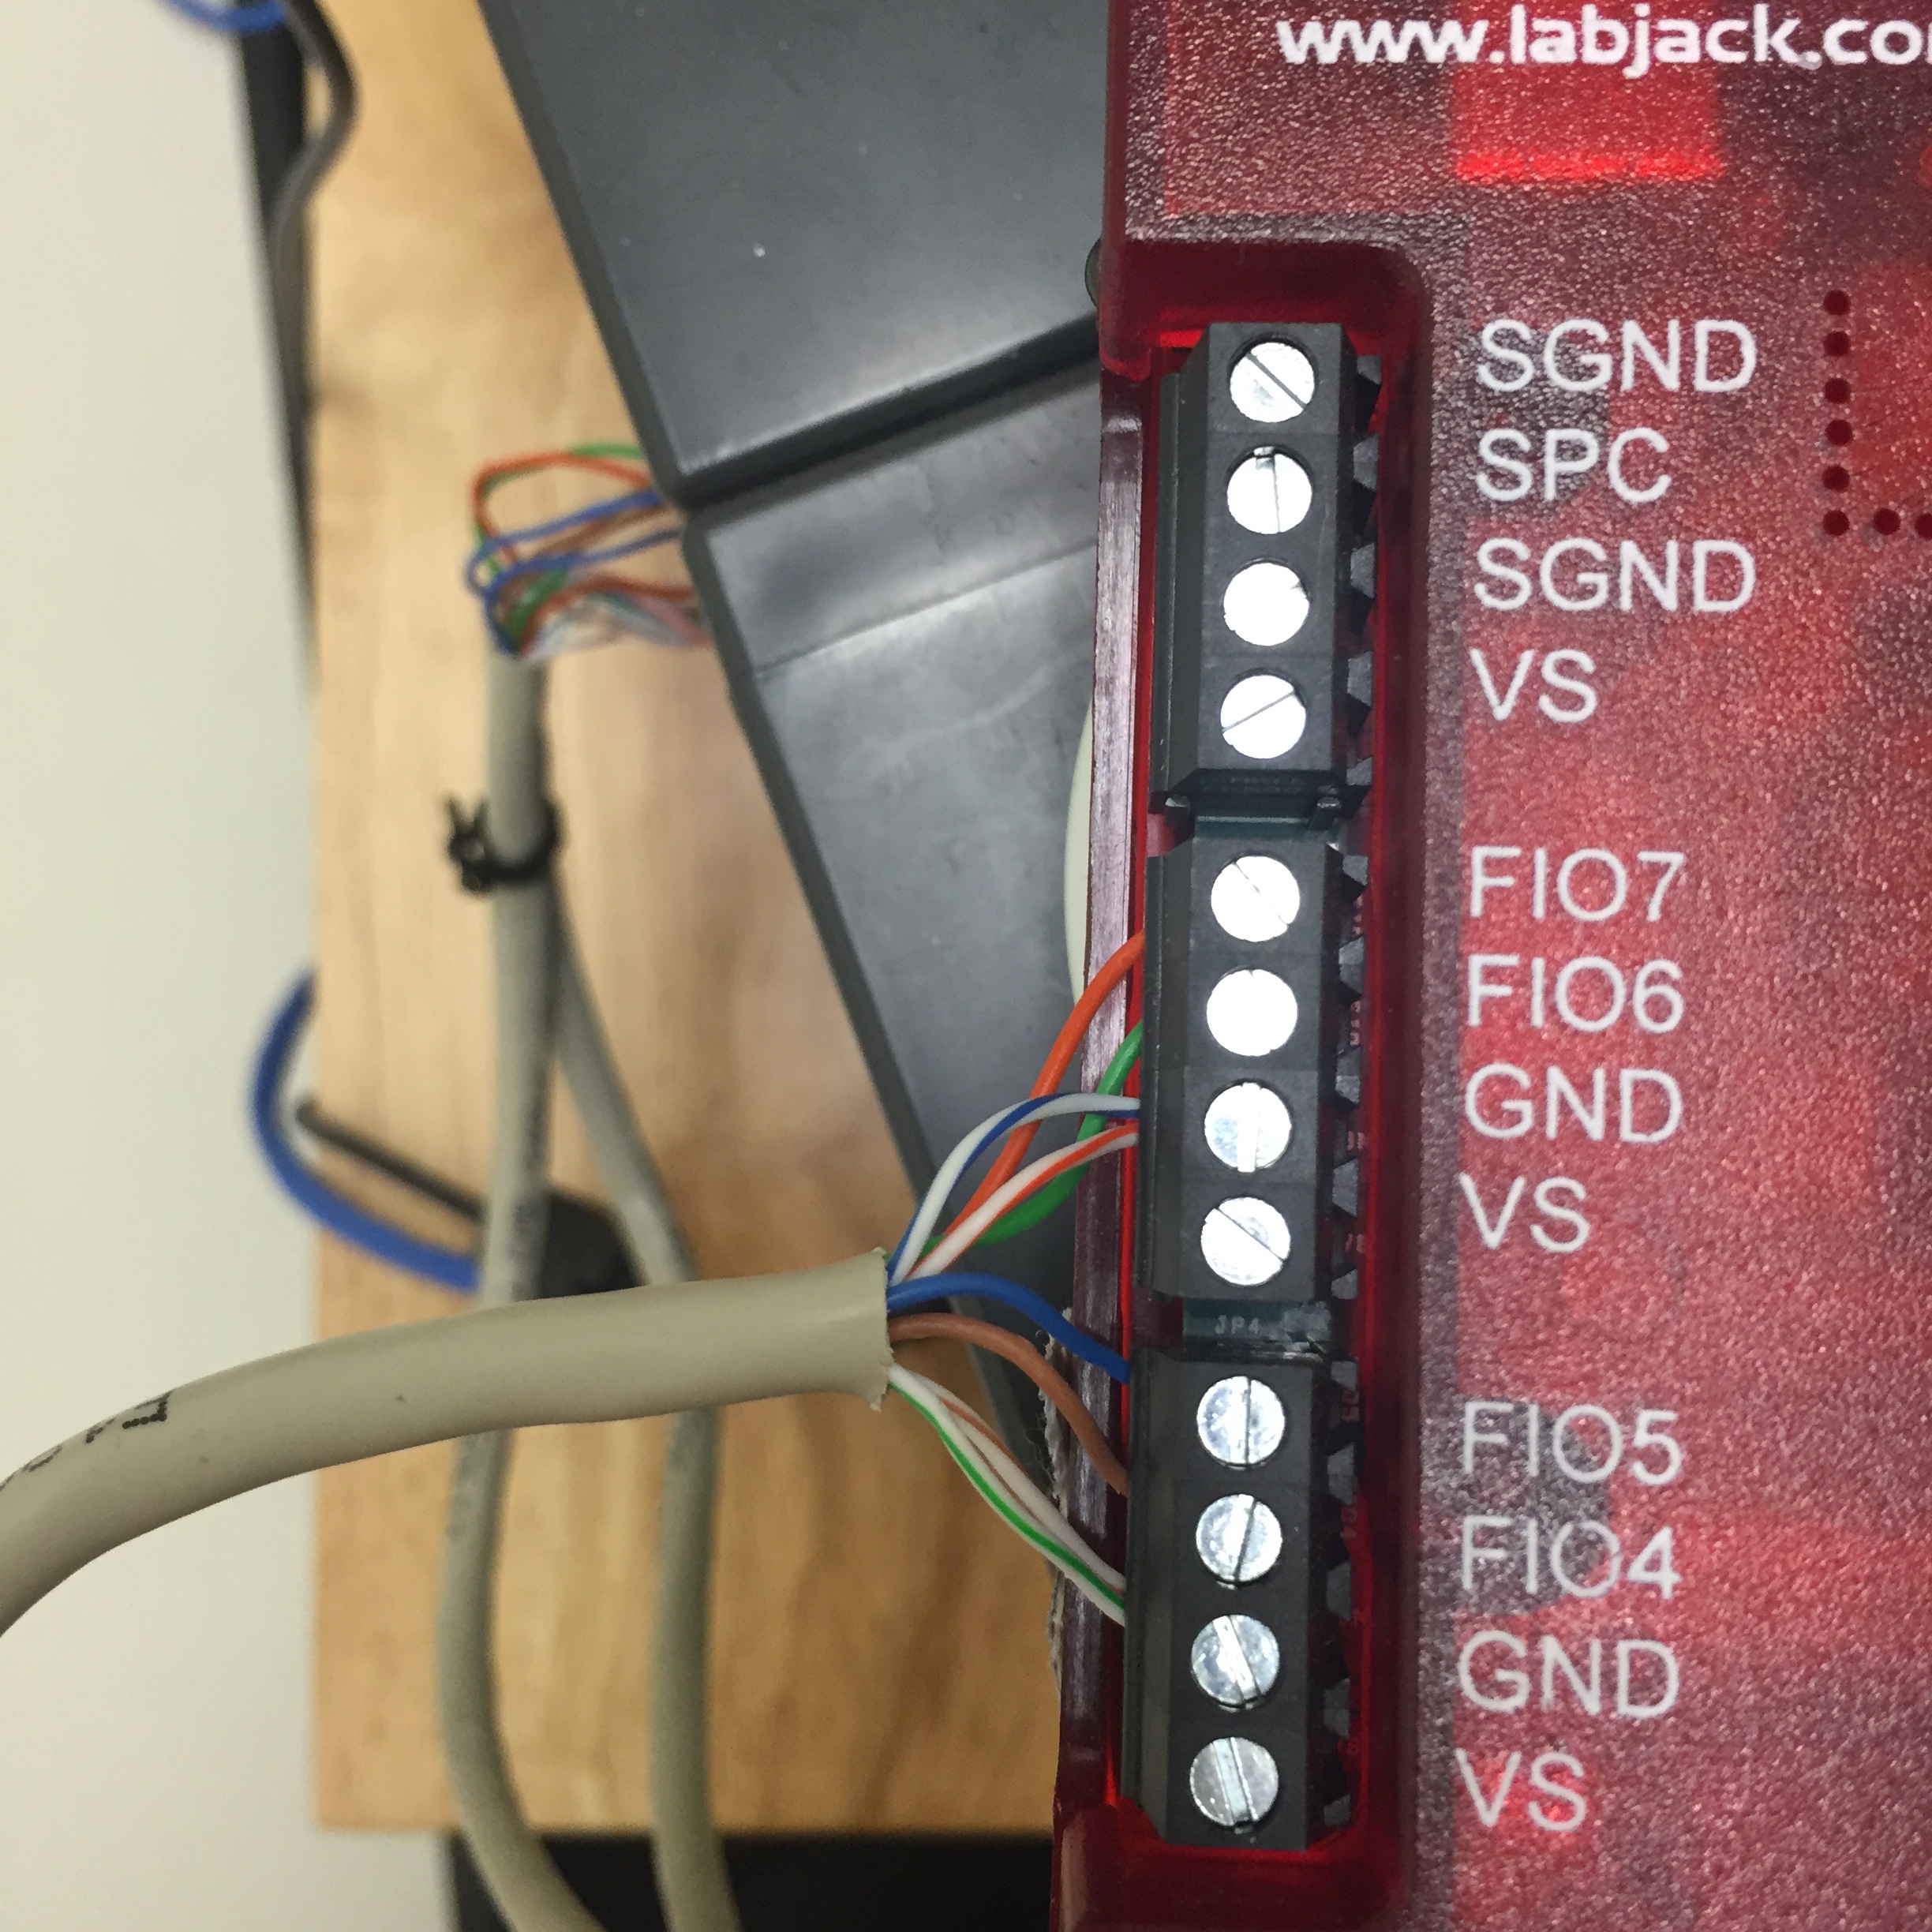
Step 3: Install wires to labjack 2
Repeat on other side. Your LabJack should now look like this.
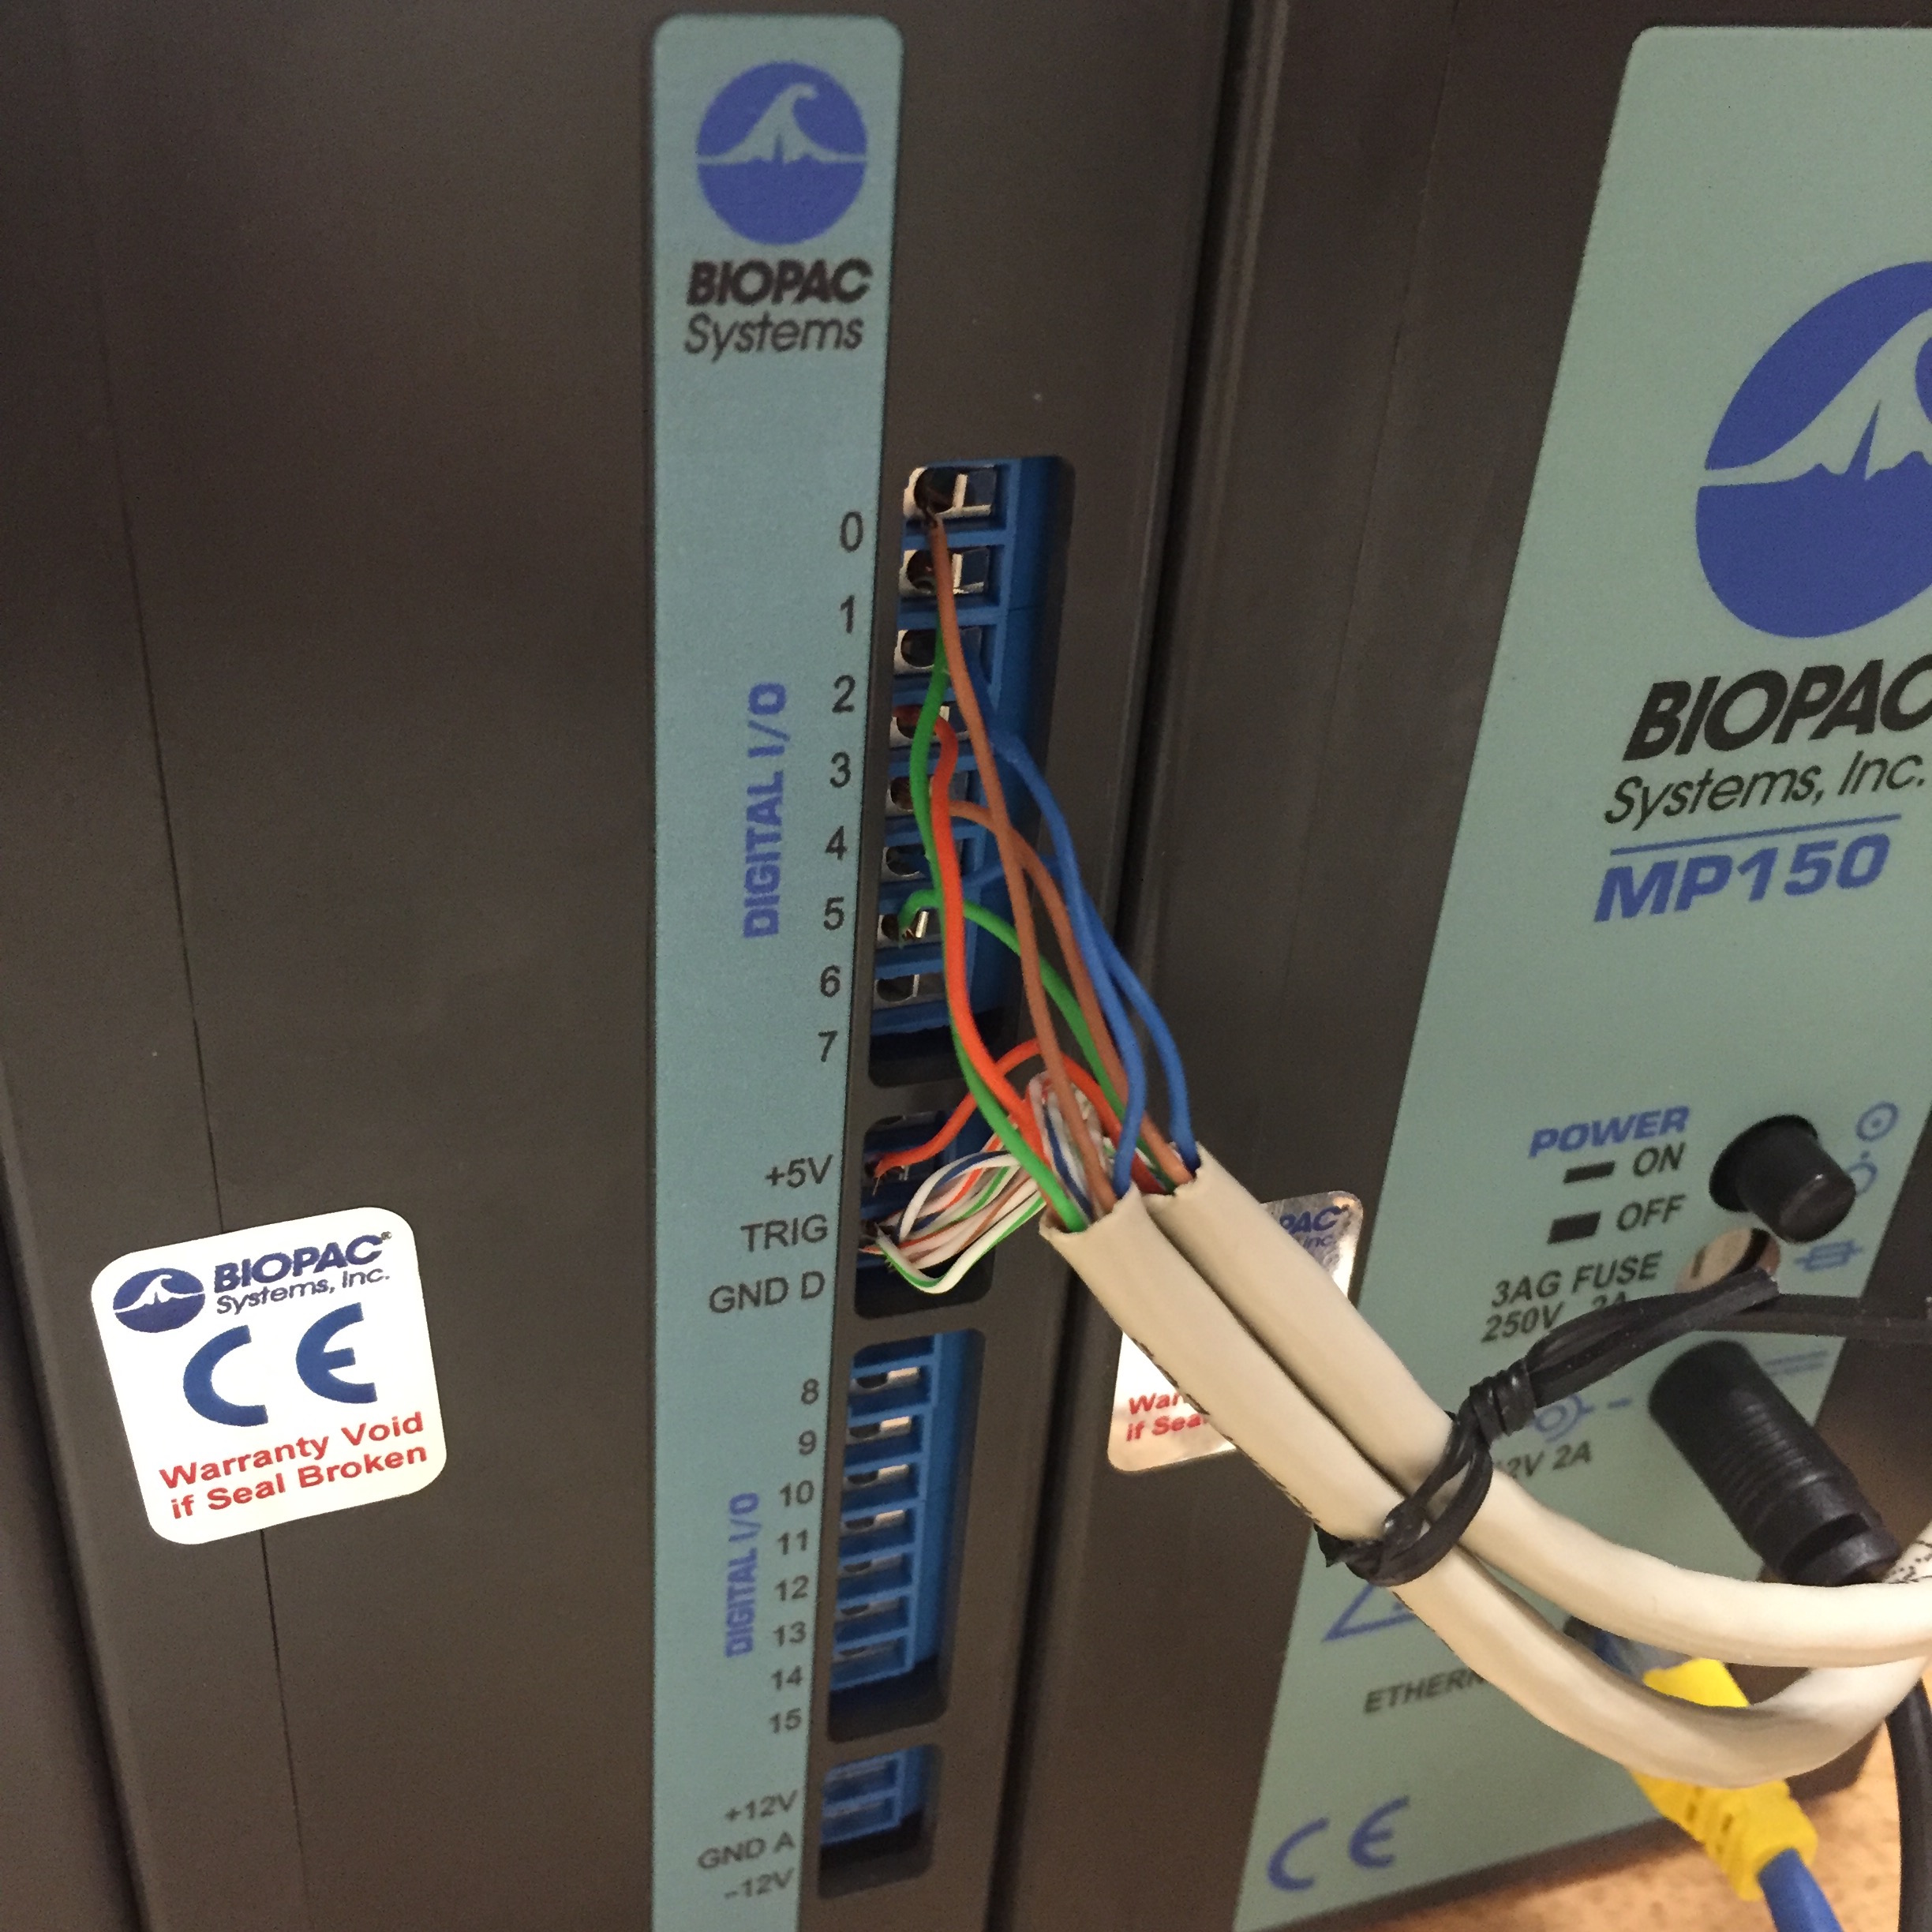
Step 4: Install wires to BIOPAC
Take the free end of the wires and plug them in to appropriate slots on the backside of your BIOPAC UIM-100C.
FI00 wire should go into DIGITAL I/O 0, FI01 to DIGITAL I/O 1 and so forth.
I plugged FI07 into the +5V TRIG to use that channel as the trigger.
Ground wires should go into the GND D.
HOW-TO (Software prep)
Setting up Acquisition
There are many ways to trigger the BIOPAC. The most simple method is to have one channel open, trigger the channel each time a stimulus appears, and then record the order of the stimulus.
Open AcqKnowledge software and navigate to MP150 - Set Up Data Acquisition - Digital
Configure the values as seen here and change the sampling rate to match your recording parameter.
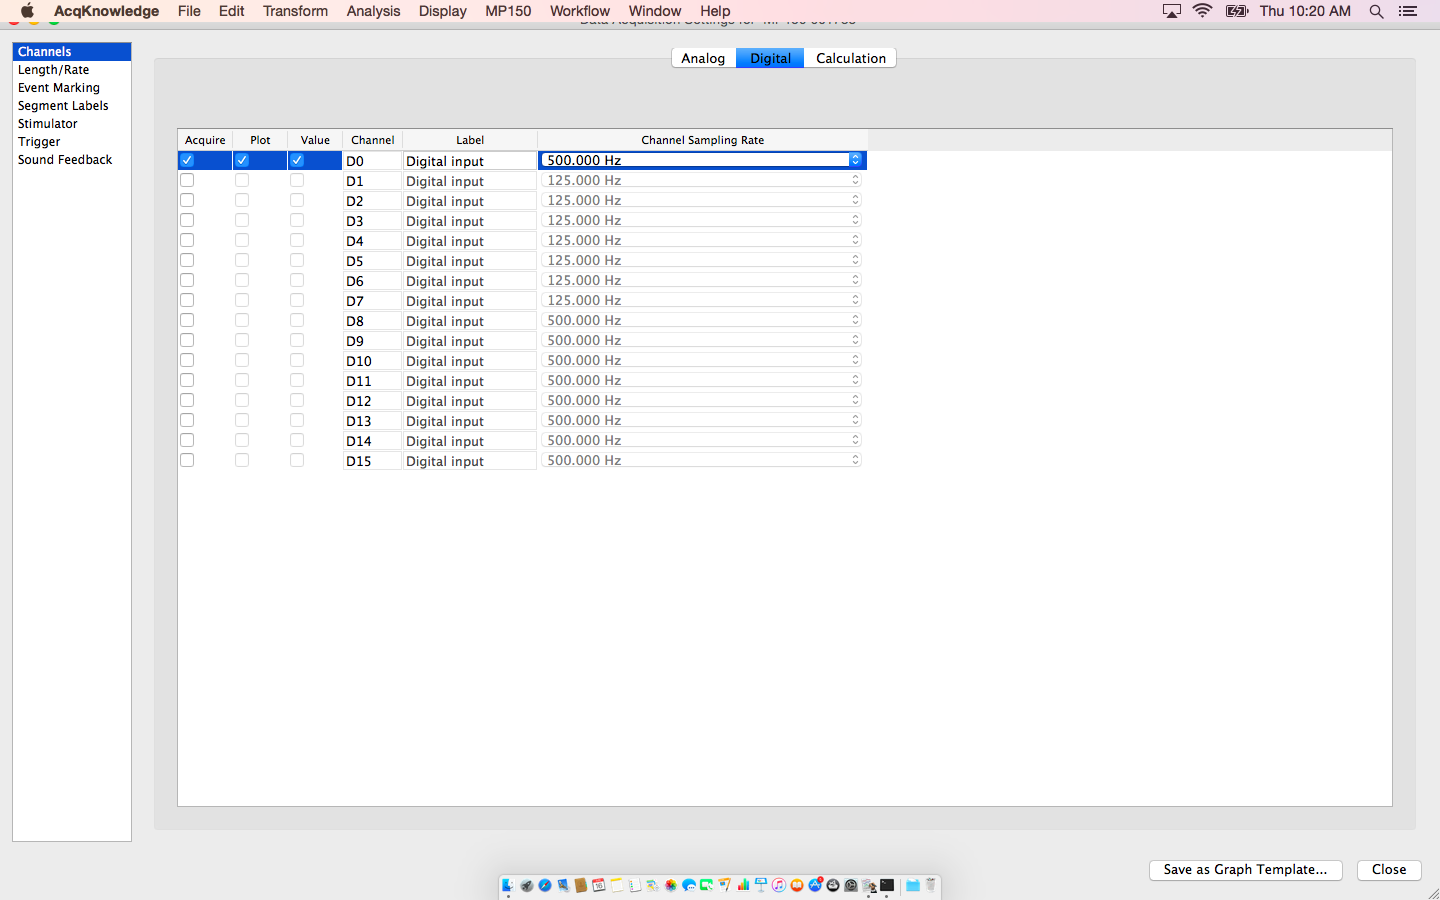
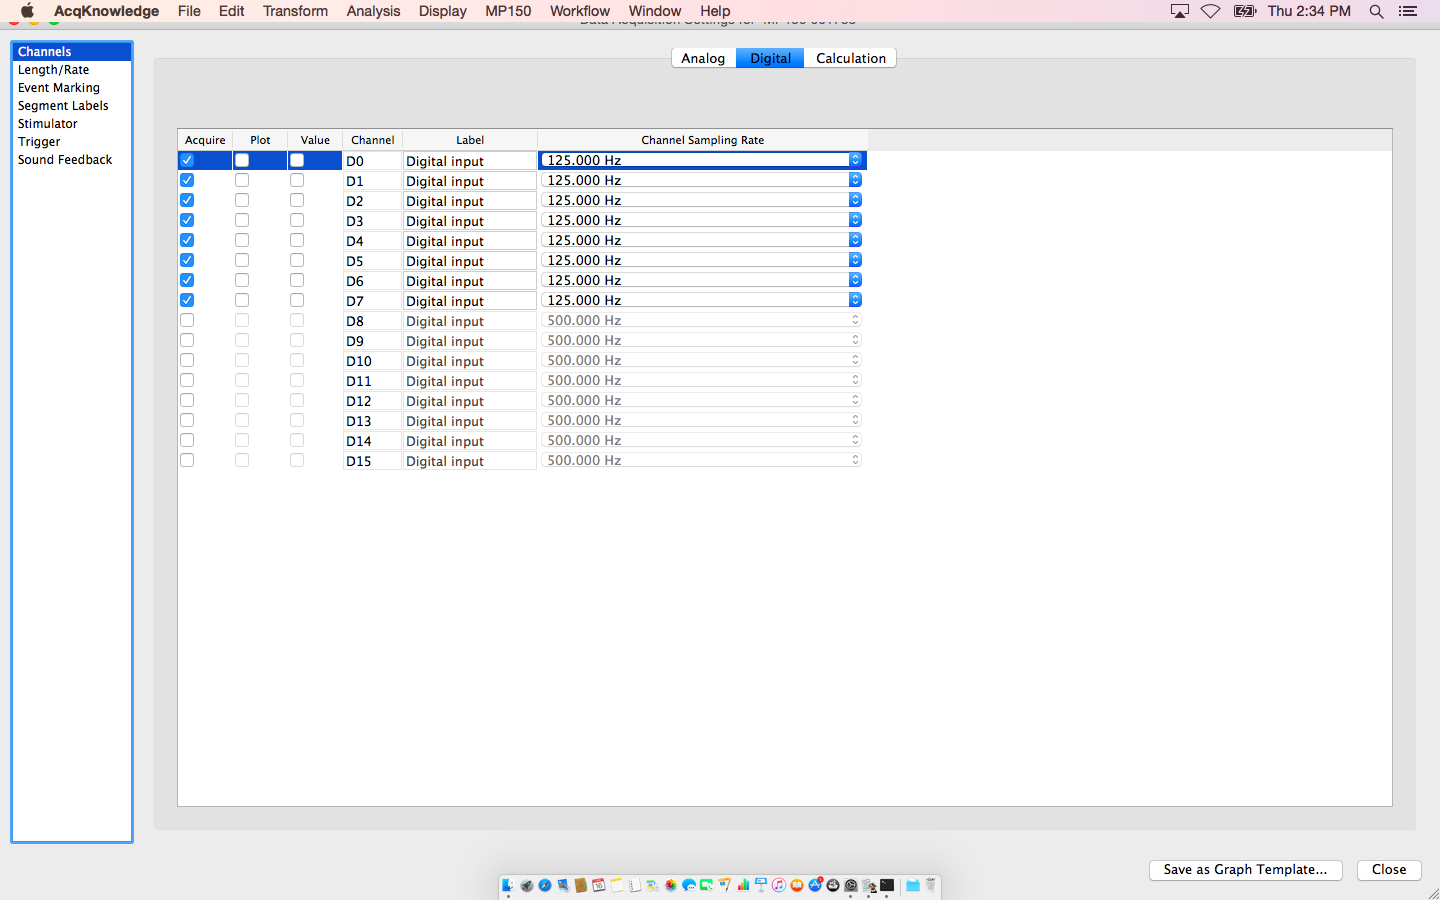
If you want additional flexibility just add more channels to your recording (more info in next section).
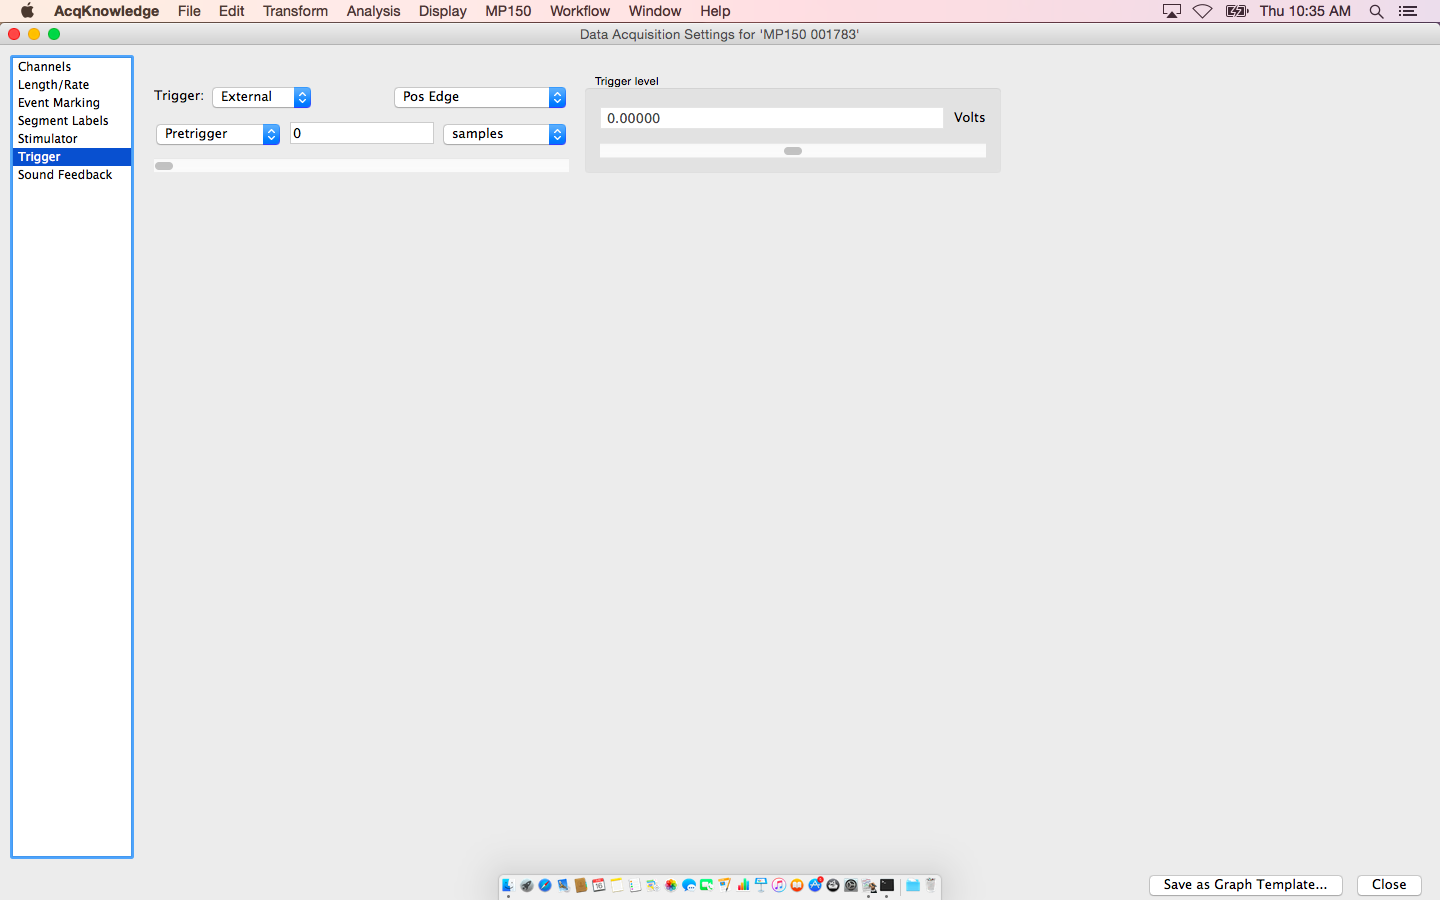
If you want to trigger-start the BIOPAC, change settings at Set Up Data Acquisition - Trigger
Sending Trigger from MATLAB
Step 1: Install driver and LabJack function
Install exodriver for libusb provided by LabJacks here. You can also install via homebrew by using Mac terminal ‘’’ brew install libusb exodriver –universal ‘’’
Iandol has created a useful matlab function in his github repository here. Download the file to your workspace and you can either trigger or send values to BIOPAC
Step 2: Send trigger through code
- Use one channel
You can use one channel to record stimulus onsets and record the stimulus order independently in MATLAB. Here is the code to send a TTL pulse to trigger channel FI00
% initialize
lj = labJack('verbose',false)
% Send TTL trigger pulse
% First argument is channel #, second value is duration in ms
lj.timedTTL(0,200);
Now when you record, you can record triggers like this.

- Use multiple channels
Alternatively, you can use all 8 channels to account for 2^8 conditions for each number.
The value you send to BIOPAC will be converted to binary with each channel representing a digit.
For instance if you lj.setDIOValue(2,[255 255 255]);
The binary number is 0000010, [… FI02 FI01 FI00], so your FI01 channel will turn ON.
If you lj.setDIOValue(5,[255 255 255]);
The binary number is 0000101, [… FI02 FI01 FI00], so your FI02 and FI00 channel will turn ON.
% initialize
lj = labJack('verbose',false)

% Set all channel values to 2
lj.setDIOValue(2,[255 255 255]);

% Set all channel values back to 0
lj.setDIOValue(0,[255 255 255]);
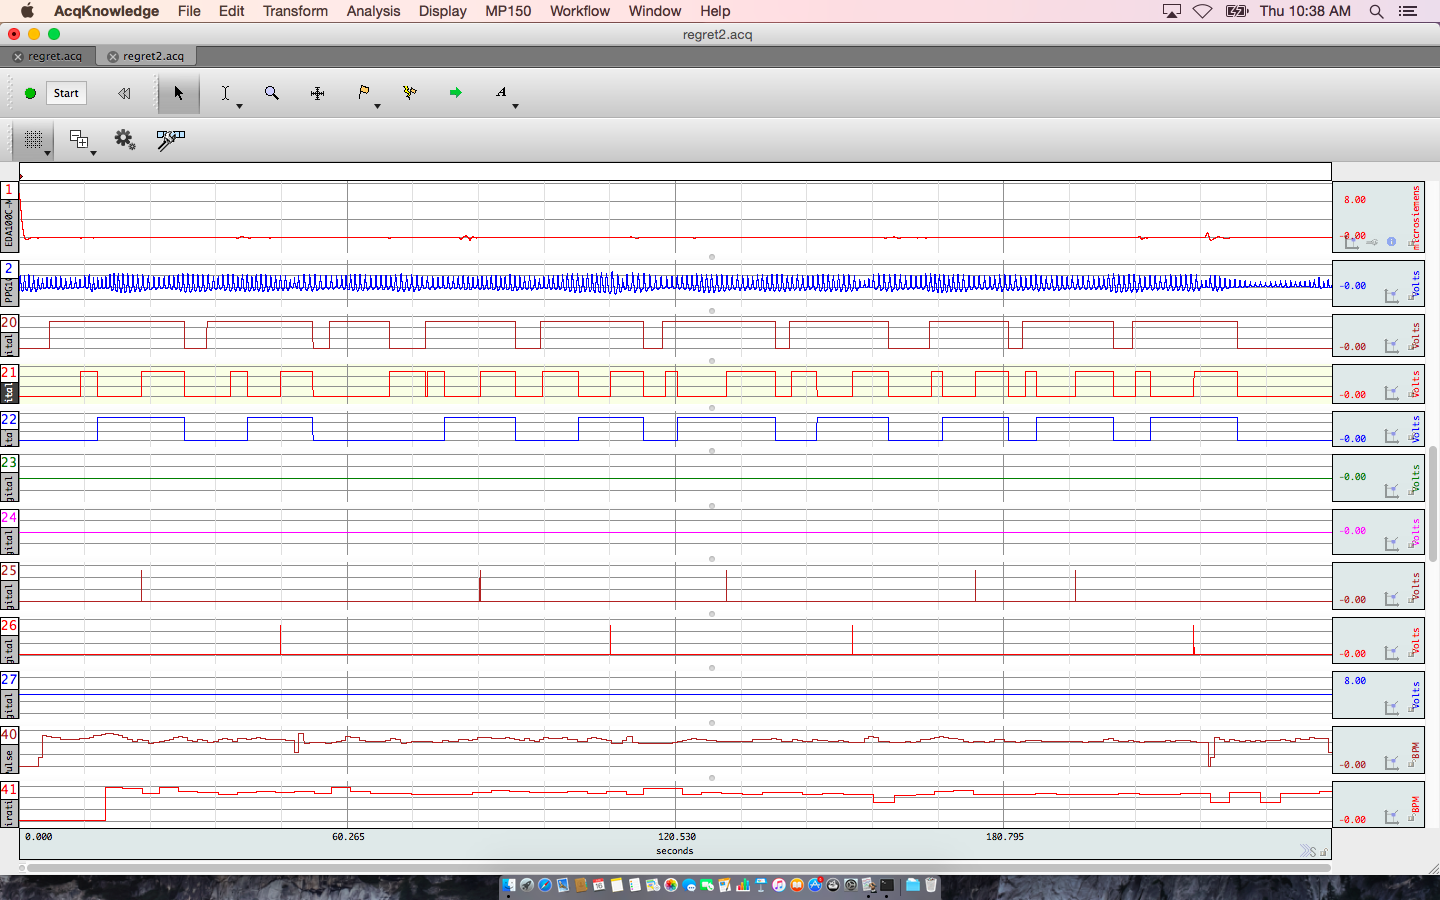
Your recording will now look like this with multiple channels turning on and off to represent values.
Sending Trigger from Psychopy
We are slowly transitioning to writing our paradigms in Psychopy. Here are the scripts used to trigger labjack from Psychopy.
# import psychopy labjack library
from psychopy.hardware.labjacks import U3

# Initialize labjack
lj = U3()

# Get calibration info and turn FIO 0 to off (usually starts as ON)
cal_data = lj.getCalibrationData()
if lj.getFIOState(0) == 1:
    lj.setFIOState(0,0) #Make sure we start with the trigger off

# At onset of event toggle FIO 0 to ON
lj.setFIOState(0,1)

# At offset of event toggle FIO 0 to OFF
lj.setFIOState(0,0)
hack python matlab labjack